< Previous | Contents | Next >
— Output: Choose how to use the noise pattern.
— Composite Onto Clip: The noise pattern is placed on top of or mixed into the video clip.
— Composite Type: Selects composite mode for the noise pattern.
— Put Into Alpha Channel: The noise is inserted into the node’s Alpha channel, allowing you to use the noise pattern for compositing purposes. Please note, you will also need to right click on the node and select “Use OFX Alpha” to activate this setting. Alternatively, you can drag the Fast Noise effect directly into the Node Graph as an FX Node instead of applying it to a corrector node, and you can use the Alpha without additional settings.
— Use to Warp Image: The noise pattern is used to distort the image.
— Input Alpha: Controls what to do with the input Alpha channel.
— Limits Warping Effect: Limits the warp to certain areas as defined by the Alpha channel. For example, when you want to have a water ripple or heat shimmer on only certain part of the clip.
— Gets Warped as Well: The warp affects the Alpha channel in addition to the RGB channels. For example, when warping a logo with a transparent background.
Film Damage
Found in the ResolveFX Texture category. After you’ve used the new ResolveFX Revival plugins to fix damage in archival footage, you can turn around and use the Film Damage plugin to make brand new digital clips look worn, dirty, and scratched instead. When used in conjunction with the Film Grain and Flicker Addition plugins, you can convincingly recreate the feel of poorly kept vintage archival footage.
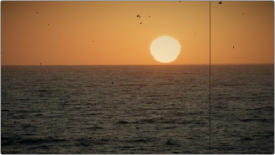
![]()
(Left) Original image, (Right) Result with Film Damage
Blur and Shift Controls
The three parameters at the top let you alter the foundation of the image to begin creating the look of an older film.
— Film Blur: Adds just a bit of targeted defocusing to knock the digital sharpness out of the image.
— Temp Shift: Defaults to warming the image just a bit to simulate the warmer bulb of a film projector, although you can use it to cool or warm the image in varying amounts.
— Tint Shift: Defaults to yellowing the image to simulate damage to the film dyes, but you could move the slider in the other direction to add a bit of magenta, simulating a different kind of dye failure.