< Previous | Contents | Next >
The Canvas Controls pop-up menu lets you switch between corner-pin controls, where dragging the four corners lets you corner-pin, dragging the center lets you reposition, and dragging the top, bottom, and sides lets you resize vertically or horizontally.
A Reset Corners button lets you reset the grid to full screen, if you need to scrap what you’re doing and try again.
The Display Options group
This group lets you turn the visibility of different onscreen controls off and on. Checkboxes let you Show Trackers, Show Center (the red tracking center point), and Show Paths (the tracked motion paths).
Show Comp Result lets you see the composited foreground layer against the background layer.
Compositing
The Compositing controls govern the third stage of the match moving process, to use when fitting the foreground image against the background image to make a seamless composite. Note, if you need
to color correct the foreground image to match the background, you’ll need to add a corrector node between the Ext. Matte that’s routing in the foreground image into the Color page and the FX node that’s doing the compositing.
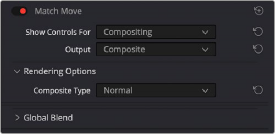
The controls that are exposed when Main Controls is set to Compositing
Rendering Options
![]()
The Composite Type pop-up menu lets you choose whether the composite that’s being output is an overlay of the Ext. Matte over the background, or the background Plate only.
Plate Cropping
Four sliders let you crop the Left, Right, Top, and Bottom of the image, if necessary.
Global Blend
The Blend slider, present in every Resolve FX plugin in DaVinci Resolve, lets you adjust the opacity of the effect, effectively controlling the opacity of the foreground layer.