
< Previous | Contents | Next >
NOTE: By choosing the Volume check box in Remove Attributes you will delete all of the Clip Gain keyframes that have been added to a clip.
NOTE: By choosing the Volume check box in Remove Attributes you will delete all of the Clip Gain keyframes that have been added to a clip.
NOTE: By choosing the Volume check box in Remove Attributes you will delete all of the Clip Gain keyframes that have been added to a clip.
For either clips or tracks, you can right-click and choose Remove Attributes to open a dialog with which to choose which attributes you want to reset to their default settings.
Audio Clip Layering
Audio layering is a special audio editing mode that lets you superimpose multiple audio clips in the same track, with audio clips edited into the top layers muting overlapping sections of audio clips appearing on lower layers. With audio layering enabled, superimposed audio clips are treated similarly to superimposed video clips that have opacity set to 100%, with clips on top obscuring (or muting) clips underneath.

An example of multiple audio performance editing using layers, where the top layer mutes overlapping sections of audio clips in lower layers

TIP: Track layering can be used on the Edit page as well.
TIP: Track layering can be used on the Edit page as well.
TIP: Track layering can be used on the Edit page as well.
Audio layering is incredibly useful for any situation where you’re combining segments of multiple takes together to create a single voiceover, audio vocal track, or dramatic performance, as you can choose which segments to use via their superimposed position in the stack of clips appearing in that track, while at the same time you’re preserving the other takes underneath in case you might want them later.
— Choose Timeline > Layered Audio Editing so that a check mark appears by the command. All overlapping audio will be layered instead of overwritten from that point forward.
1 Choose View > Show Audio Track Layers to reveal track layers for each audio track (and each lane within a given audio track) in the Timeline. When layering is on, space appears at the top of each track in the Timeline which provides a region into which you can edit layered audio clips.
2 To edit an audio clip or segment as a layer within a particular audio track, drag it from elsewhere in the Timeline or from the Media Pool, and drop it into the empty area above whatever audio is already in that track.
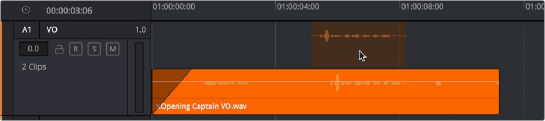
Dragging an audio clip to become layered above another clip
3 Edit the different superimposed layers of audio such that the segments of each take that you like are on top. Only the topmost clip segments will be audible. Audio segments that overlap underneath are silent. To put another layer on top, drag it from its current position to the empty area at the top of the track.
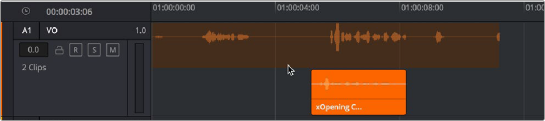
Dragging a bottom audio layer to appear on top
4 When you’re finished editing clips in track layers, choose View > Show Audio Track Layers again to hide the individual layers, so that only the topmost clips appear as a flat sequence in each track and lane.
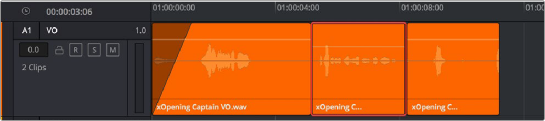
Hiding layers makes all audio layers appear on a single track, as if the top clips are overwriting what’s underneath, except the muted material underneath is preserved