< Previous | Contents | Next >
DaVinci Resolve supports audio compound clips, which are created just like any other compound clip, by selecting multiple audio clips, right-clicking one of them, and choosing New Compound Clip. Alternately, compound clips with video clips may now contain multiple audio items as well.
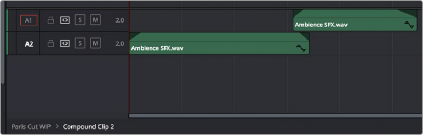
When compound clips containing audio are opened in the Edit or Fairlight pages by right-clicking an audio compound clip and choosing Open in Timeline, breadcrumb controls appear beneath the Timeline that let you exit the compound clip and get back to the master Timeline.
Opening an audio compound clip; note the path control at the bottom left of the Timeline
Audio Crossfades
You can add Cross Fade transitions to any edit point between two audio clips that have enough handles similarly to how you add video transitions, by dragging and dropping from the Effects Library, by right-clicking an edit and choosing an option from the contextual menu, or by selecting an audio edit point and choosing Timeline > Add Audio Only Transition (Shift-T).
Cross Fade transitions are a quick and easy way to fade the volume of the outgoing clip down while simultaneously fading the volume of the incoming clip up, letting you create a smooth aural transition between two audio clips.
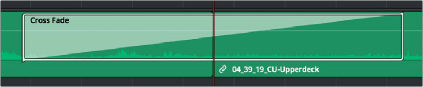
An audio Cross Fade transition applied between two clips
![]()
You can double-click a Cross Fade transition to open it into the Inspector, revealing the following parameters:
— Duration: The duration of the transition, shown in both seconds and frames.
— Alignment: A drop-down that lets you choose the transition’s position relative to the edit point it’s applied to. Your choices are “End on Edit,” “Center on Edit,” and “Begin on Edit.”
— Transition style: You can choose –3dB, 0dB, or +3dB to set both the Fade In and Fade Out levels to the same value. For more information on what these levels mean, see the following parameter.