< Previous | Contents | Next >
The Fairlight page supports VST effects from Mono to 7.1 - and beyond. These effects can be inserted on mono channels or Link Groups. If a stereo VST effect is inserted on a LCR, LCRS, or 5.1 Link Group, the left and right channels will be allocated to left and right Link Group channels automatically.
DaVinci Resolve supports VST3. VST effects are available on macOS and Windows workstations, but not on Linux.
VST Effects versus VST Instruments (VSTi)
A VST effect is a type of VST plugin that is used to process audio. A VST effect might be a Reverb, Compressor, or EQ. VST Instruments are typically used to synthesize sound or play back sampled audio. VSTs have rapidly replaced hardware synthesizers and dedicated samplers due to their flexibility, repeatability, and low cost.
Audio Units
Audio Units are an audio plugin API created by Apple. Similarly to VST, Audio Units (AU) can either process audio, or work as instruments. Audio Units are only available on macOS workstations.
Using Audio Plugins
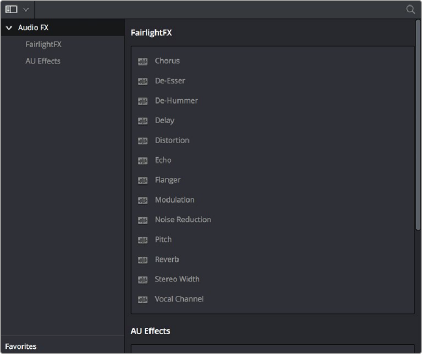
Fairlight FX are pre-installed on all DaVinci Resolve installations. If you install additional VST or Audio Unit effects on your workstation, they appear in the Audio FX panel of the Effects Library, organized in separate categories.
![]()
Audio plugins in the Effects Library
You can click on the far right of any effect to flag it with a star as a favorite effect. When you do so, the favorited effects appear in a separate Favorites area at the bottom of the Effects Library Bin list, and it also appears at the top of the Effects button’s menu on the Mixer when you click the “plus” button.

Stars indicate a flagged favorite effect; all favorites are currently filtered
Audio plugins let you apply effects to individual audio clips or entire tracks worth of audio, to add creative qualities such as echo or reverb, or to take care of mastering issues using noise reduction, compression, or EQ.
— To apply an audio filter to a clip: Drag any filter from the Audio FX panel of the Effects Library onto the clip in the Timeline you want to apply it to.
— To apply an audio filter to multiple clips: Select all of the clips you want to apply an audio filter to, then drag any filter from the Audio FX panel of the Effects Library onto any of the selected clips.
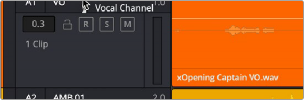
When you apply an audio plugin to a clip, a badge appears to the left of that clip’s name bar in the Timeline to let you know there’s an effect applied to it.

Timeline clips with audio plugins applied appear with a badge.
— To apply an audio filter to an entire track in the Timeline: Drag any filter from the Effects Library onto the track header.
Applying an audio filter to a whole track via the Timeline
![]()
— To apply an audio filter to a track or bus in the Mixer: Drag any filter from the Audio FX panel of the Effects Library onto the clip in the Timeline you want to apply it to.
Applying an audio filter to a whole track via drag and drop to the Mixer
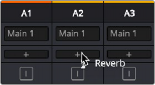
— To apply an audio filter to a track or bus using the Mixer controls: Click the plus button in the channel strip of the track you want to apply an effect to, and then choose a filter from the drop- down menu that appears. All filters appear within categories to make them easier to find. If you’ve clicked the star button of any filters in the Effects Library to favorite them, these favorite filters appear at the top of the plus button’s drop-down list.
— To copy audio filters from one mixer channel to another: Hold the Option key and click and drag the effect to the desired channel and slot to copy.
— To reorder audio filters in the mixer: Click and drag the audio filter to move to the desired slot position.
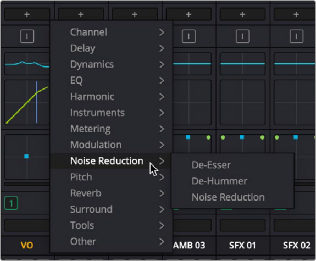

TIP: The categories that audio filters are organized into in the Mixer can be edited in the audio plugins panel of the DaVinci Resolve System Preferences window. All plugins on a workstation are shown in the Available Plugins list, and clicking within the Category column lets you use a drop-down menu with which to change categories.
TIP: The categories that audio filters are organized into in the Mixer can be edited in the audio plugins panel of the DaVinci Resolve System Preferences window. All plugins on a workstation are shown in the Available Plugins list, and clicking within the Category column lets you use a drop-down menu with which to change categories.
TIP: The categories that audio filters are organized into in the Mixer can be edited in the audio plugins panel of the DaVinci Resolve System Preferences window. All plugins on a workstation are shown in the Available Plugins list, and clicking within the Category column lets you use a drop-down menu with which to change categories.
Applying an audio filter to a whole track via the Mixer’s own controls
— Select that clip and open the Inspector. All audio plugins applied to that clip appear in the Effects tab, with that filter’s controls appearing directly in the inspector.
— Click in the background of the Timeline header to select that track, and then open the Inspector. Click the custom UI button for that filter to open its controls.

The custom UI button for audio plugins in the Inspector
— Move the pointer over the plugin’s name in the Effects area of the Mixer, and click on the custom UI button to open its controls.
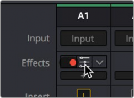
The custom UI button for audio plugins in the Mixer
Nearly all Fairlight FX, VST, and Audio Unit audio plugins have a custom user interface that makes it much easier to manipulate that filter’s controls. These can be opened from within DaVinci Resolve.
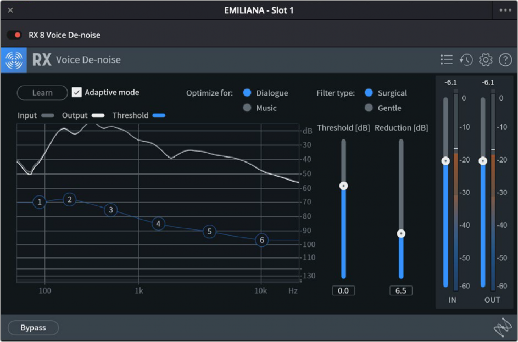
The custom audio filter interface for iZotope RX Voice De-noise
— To rearrange the order of multiple video filters applied to a clip: Click the move up or move down buttons in any filter’s title bar, to the left of each filter’s Trash Can button.
— To disable or re-enable a filter: Click the toggle button at the far left of each filter’s title bar.
— To remove a filter: Click the Trash Can button.
![]()
— To reset any filter parameter: Click the Reset button at the far right of the parameter you want to reset.
— To open or collapse a filter’s parameters: Double-click the title bar.
— To open or collapse the parameters of all filters: Hold the Option key down and double-click any filter’s title bar.
Once applied to a clip or track, audio plugins can also be keyframed or automated just like volume and pan settings, to create dynamic audio effects that change over time.