< Previous | Contents | Next >
Two buttons at the top of the Data Burn window let you choose whether you want to edit one set of burned-in metadata that will be displayed for the entire duration of the Timeline, or edit burned-in metadata on a clip-by-clip basis. You can combine the two, having timeline-wide window burn settings and separate clip-specific window burn settings for a handful of clips in that timeline at the same time.
![]()
When rendering in the Delivery page, window burns are applied both when rendering timelines as individual source clips and when rendering as one single clip.
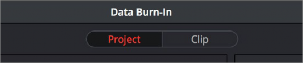
Two separate panels let you adjust project-wide window burns vs. clip-specific window burns
Setting Up Burned-In Metadata
Setting up different clip and project metadata to output as a window burn is easy.
1 Choose Workspace > Data Burn-In.
2 Click Project or Clip at the top of the Data Burn-In window.
3 Turn on the checkboxes of whatever items of metadata you want to display in the “Add to
Video Output” column. More information about the available items appears later in this chapter.
The first item of metadata is centered near the bottom of the frame, above Action Safe. Each additional item of metadata you turn on for display is added above whichever items are already displayed, regardless of their position in the “Add to Video Output” list.
4 Click any currently enabled item of metadata from the list to highlight it in black, and edit that item’s Custom Output parameters at the right. More information about the available parameters appears later in this chapter.
Click the Reset button next to the Option drop-down menu to reset the current mode of the Data Burn window.
Saving and Loading Burn-In Presets
If there are common sets of metadata that you regularly use and switch among, you can save each set up as a preset for future use.