< Previous | Contents | Next >
You’ll use the Timeline in the Deliver page to define the range of clips you want to render or output to tape, and to choose which versions for each clip you want to output. The Deliver page Timeline consists of a Thumbnail timeline at top (that can be shown or hidden via the Clips button) that makes it easy to select individual clips or ranges of clips that you need to render, and a more ordinary timeline below that you can use to set In and Out points for rendering arbitrary regions of your program. A Timeline toolbar lets you choose the render range of the Timeline, and has controls for customizing the look of the Timeline, and for zooming in and out.
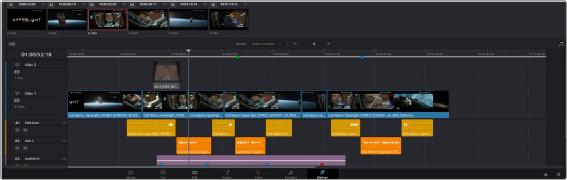
The Deliver page’s Timeline and Thumbnail timeline

TIP: Press Shift-Z to fit the entire program into the available width of the Timeline.
TIP: Press Shift-Z to fit the entire program into the available width of the Timeline.
TIP: Press Shift-Z to fit the entire program into the available width of the Timeline.
Filtering the Thumbnail Timeline
The Deliver page Thumbnail timeline also has the Timeline Filter drop-down, available to the right of the Clips button in the Interface toolbar.

The Deliver page’s Thumbnail timeline matches the Color page
Using this drop-down to filter the contents of the Timeline lets you restrict the range of media you want to output in different ways. For example, if you’ve already rendered a timeline, but you’ve since made some changes, you can use one of the “Modified Clips” options to display only the clips that have changed within a particular timeframe. Another commonly used option is to choose
“Unrendered Clips” to isolate all clips that have not yet been rendered in workflows where you’re only rendering a part of the Timeline at a time.