< Previous | Contents | Next >
Using Presets for Fast Rendering
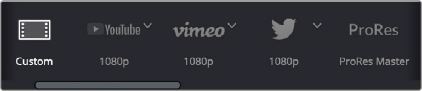
The very top of the Render Settings list has a set of presets for many of the most common rendering workflows you’ll need to accomplish. If you want to create your very own settings, then choose custom. Each preset automatically sets up what you need and locks you out of settings that are not necessary for rendering that type of media.
Render presets selection
Custom
When custom is selected, nothing is automatically set, and all conventional media rendering options are available, except for those that are specifically associated with particular presets. You must manually choose the settings and options you need. All Render settings are saved on a per- project basis.
YouTube, Vimeo, Twitter, Tik Tok, and Dropbox Presets
These presets let you render media specifically for video sharing services, with the option to upload the rendered files automatically.
YouTube 720p/1080p/1440p/2160p
A drop-down menu lets you choose four different resolutions to render to and selects the appropriate settings for exporting your program as a file suitable for uploading to YouTube and many other video file sharing services. The preset renders a single clip at the timeline’s frame rate and sets the following parameters:
— Format: MP4
— Video Codec: H.264
— Encoding Profile: High
— Audio: Bus 1
— Audio Codec: AAC
— Data burn-in: Same as Project
— Use Proxy Media: Lets your final render use the proxy media instead of the original source camera files. Useful if speed is more important than quality.
— Upload directly to YouTube: When this box is checked, the resulting render will automatically upload to your YouTube account, and the following parameters will become available. If you have multiple YouTube Channels on your account, you can select which channel to upload to.
— Title: Enter the title of your video.
— Description: Enter a description of your video.
— Chapters from Markers: Checking this box embeds chapter points in the YouTube video corresponding to the the selected marker color and the marker’s position on the Timeline.
— Upload Thumbnail: Checking this box will open a file browser, allowing you to select a still image that will become the thumbnail image for your video on YouTube.
— Visibility: You can change how your video will be accessible on YouTube.
— Category: You can select your video’s YouTube category.
Vimeo 720p/1080p/2160p
A drop-down menu lets you choose three different resolutions to render to and selects the appropriate settings for exporting your program as a file suitable for uploading to Vimeo and many other video file sharing services. The preset renders a single clip at the timeline’s frame rate and sets the following parameters:
— Format: MP4
— Video Codec: H.264
— Encoding Profile: Auto
— Audio: Bus 1
— Audio Codec: AAC
— Data burn-in: Same as Project
— Use Proxy Media: Lets your final render use the proxy media instead of the original source camera files. Useful if speed is more important than quality.
— Upload directly to Vimeo: When this box is checked, the resulting render will automatically upload to your Vimeo account, and the following parameters will become available.
— Title: Enter the title of your video.
— Description: Enter a description of your video.
— Visible To: You can change how your video will be accessible on Vimeo, including password protection.
Twitter 720p/1080p
A drop-down menu lets you choose three different resolutions to render to and selects the appropriate settings for exporting your program as a file suitable for uploading to Twitter and many other video file sharing services. The preset renders a single clip at the timeline’s frame rate and sets the following parameters:
— Format: MP4
— Video Codec: H.264
— Encoding Profile: Auto
— Audio: Bus 1
— Audio Codec: AAC
— Data burn-in: Same as Project
— Use Proxy Media: Lets your final render use the proxy media instead of the original source camera files. Useful if speed is more important than quality.
— Upload directly to Twitter: When this box is checked, the resulting render will automatically upload to your Twitter feed, and the following parameter will become available.
— Description: Enter text to be added to your video.
TikTok Deliver Page Preset
A drop-down menu lets you choose two different resolutions to render to and selects the appropriate settings for exporting your program as a file suitable for uploading to TikTok and many other video file sharing services. The preset renders a single clip and sets the following parameters:
— Resolution: 1920x1080 HD
— Use Vertical Resolution: Unchecked. Check this box if you want to deliver your video in portrait mode for proper display on phones. This should be on for TikTok.
— Frame rate: The chosen frame rate of your timeline. You can also override this and set another frame rate manually.
— Format: MP4
— Video Codec: H.264
— Encoding Profile: Auto
— Audio: Bus 1
— Audio Codec: AAC
— Data burn-in: Same as Project
— Use Proxy Media: Lets your final render use the proxy media instead of the original source camera files. Useful if speed is more important than quality.
— Upload directly to TikTok: When this box is checked, the resulting render will automatically upload to your TikTok account, and the following parameters will become available.
— Title: Enter the title of your video.
— Visible To: Lets you choose who will be able to view this video. The options are Private, Public, and Friends.
— Allow comments: Checking this box allows commenting on your TikTok video. Un-checking this box forbids comments on your video.
— Allow Duet: Checking this box will allow your video to be used side-by-side with a video from another creator in TikTok using the Duet function.
— Allow Stitch: Checking this box will allow your video to be edited and combined with a video from another creator in TikTok using the Stitch function.
Dropbox or Dropbox Replay 720p/1080p/2160p
A drop-down menu lets you choose three different resolutions to render to and selects the appropriate settings for exporting your program as a file suitable for uploading to Dropbox and many other video file sharing services.
The preset renders a single clip at the timeline’s frame rate and sets the following parameters:
— Format: MP4
— Video Codec: H.264
— Encoding Profile: Auto
— Audio: Bus 1
— Audio Codec: AAC
— Data burn-in: Same as Project
— Use Proxy Media: Lets your final render use the proxy media instead of the original source camera files. Useful if speed is more important than quality.
— Upload directly to Dropbox: When this box is checked, the resulting render will automatically upload to your Dropbox account.
Setting Up Video Sharing Uploads
DaVinci Resolve has account integration with YouTube, Vimeo, Twitter, Dropbox, and Frame.io that allows you to render and upload directly to each service. An Internet Accounts panel in the System tab of the DaVinci Resolve Preferences lets you sign into your YouTube, Vimeo, Twitter, Dropbox, and Frame.io accounts, as well as specify a local cache location for media being synced with Frame.io.
For each service you sign into, a floating window presents the interface in which you’ll need to enter your login name and password to enable integration, followed by whatever two-factor identification and other required steps are necessary. Once entered, DaVinci Resolve will sign in to each of these services automatically when DaVinci Resolve opens.
For each service you sign into, the service’s upload parameters will also be available in the Custom Export Video settings in the Deliver page. This allows you to create your own custom file settings that can supersede the normal formats allowed by the service presets, while allowing you the convenience of the all-in-one uploading and description entry of the preset.


NOTE: For Frame.io, the local cache location is used to store clips you import into a DaVinci Resolve project from the Frame.io volume in the Media Storage panel of the Media page.
NOTE: For Frame.io, the local cache location is used to store clips you import into a DaVinci Resolve project from the Frame.io volume in the Media Storage panel of the Media page.
NOTE: For Frame.io, the local cache location is used to store clips you import into a DaVinci Resolve project from the Frame.io volume in the Media Storage panel of the Media page.
The Internet Accounts panel of the System tab of the DaVinci Resolve Preferences window