< Previous | Contents | Next >
Automatic Proxy Generation and Upload to Blackmagic Cloud Storage
When in the Media, Cut, Edit and Fairlight pages, DaVinci Resolve can automatically generate proxies in the background to upload to Blackmagic Cloud. In all pages, users can still explicitly generate proxy media from the media pool to start uploads.
1 In the Project Settings, click on the Blackmagic Cloud tab.
2 In the “For media files” section, click on “Sync proxies only.”
3 Check the “Generate proxies automatically” box.
4 In the “Proxies are created as” section, select the codec you want the proxy format to be rendered to.
5 Click on the Save button.
1 In the Project Settings, click on the Blackmagic Cloud tab.
2 In the “For media files” section, click on “Don’t sync media.”
3 Uncheck the “Generate proxies automatically” box.
4 Click on the Save button.
Cloud Storage Sync Icons
If you are working in a cloud library, there are Sync icons in the upper left of a clip in the Media Pool that let you know the status of each clip’s status in the cloud.
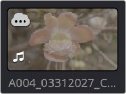
The Proxy Processing icon in the upper left
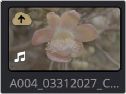
The Upload Queue icon in the upper left
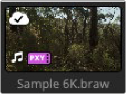
The Successful Sync icon in the upper left