< Previous | Contents | Next >
![]()
![]()
![]()

NOTE: You can move the playhead frame by frame forward and back by using the left and right arrow keys respectively.
NOTE: You can move the playhead frame by frame forward and back by using the left and right arrow keys respectively.
NOTE: You can move the playhead frame by frame forward and back by using the left and right arrow keys respectively.
![]()
Using Markers
There are three ways to make your opinion known on a clip in Presentations. The first is speaking directly through video conferencing as described above, the second and third are through markers and chat.
Markers allow you to make written comments attached to a specific frame of video. This lets you give targeted advice exactly where it needs to be. The main benefit of
using markers is that they also immediately transfer to the DaVinci Resolve timeline used to make the clip. This ensures that your comments make it back to the editor/colorist/audio engineer as they work on the project.
— Click on the Add Marker icon in the Viewer.
— Tap the letter M on your keyboard.
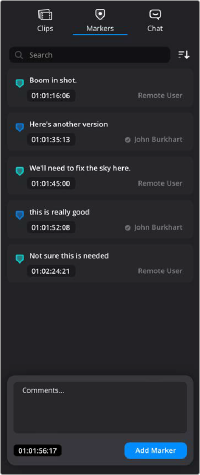
— In the Markers column, write your comment in the text box at the bottom, and click on the Add Marker button.
Markers will show up as a triangle that is the same color as the colored dot associated with the user’s thumbnail in the Video Conferencing pane.
The Markers column