< Previous | Contents | Next >
Adding Offline Reference Movies
When moving a project from another application to DaVinci Resolve, it’s useful to export the entire program as a single media file for use as an Offline Reference Movie. Then, you can import this file in a special way to use for dual Viewer comparison in the Edit page, or as a split-screen comparison for fade wipe in the Color page. As of DaVinci Resolve 16 it’s no longer necessary to import reference movies in this way to make an offline comparison, but it can still be convenient when managing multiple timelines and versions that require great specificity.
![]()
— Right-click it in the Media Storage panel, and choose “Add As Offline Clip.”
That clip appears with a small checkerboard badge in its icon in the Media Pool, or as the icon to the left of the Media Pool.
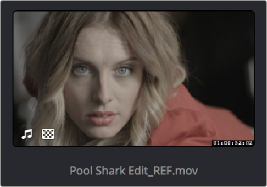
Checkerboard icon indicating an Offline comparison video
For more information on using an offline video to compare with an imported Timeline in the Edit page, see Chapter 55, “Preparing Timelines for Import and Comparison.” For more information on split-screen reference of Offline video in the Color page, see Chapter 124, “Using the Color Page.”
Extracting Audio in Media Storage
If there’s a video clip in the Media Storage panel that has audio you need, but you don’t want the video component, you can use the Extract Audio command to create a self-contained audio clip that you can then import into the Media Pool by itself.
1 Right-click a clip in the Media Storage panel, and choose Extract Audio.
2 Click the Browse button in the Extract Audio dialog to find another disk location for the extracted clip.
3 Click Extract. The audio channels are extracted and written as a .WAV file to the selected destination.
4 After you’ve extracted the stand-alone .WAV file, you’ll need to import it into the Media Pool if you want to use it in your project.