
< Previous | Contents | Next >
The Timeline is divided into three parts, each of which shows different information and provides differing controls. A Timeline Ruler at the top lets you scrub the playhead across multiple clips, and can be zoomed out enough to show every clip in your entire program. Underneath, the Mini- Timeline (which can be opened or closed via a button at the right of the palette bar) shows a small representation of the Timeline in the Edit page wherein each clip is as long as its actual duration.
At the bottom of the Timeline is the Thumbnail timeline, in which each clip is represented by a single frame. The currently selected clip is outlined in orange, and information appears above and below each thumbnail such as each clip’s source timecode, clip number and track number, version name, whether it’s been graded, whether it’s been tracked, if it’s been flagged, and so on.
The Color page Timeline
Left Palettes
A series of palettes at the bottom left of the Color page provide access to different sets of grading tools, used principally for manipulating color, contrast, and raw media format settings. Each individual palette is opened by clicking the corresponding icon at the top of the Palette panel.
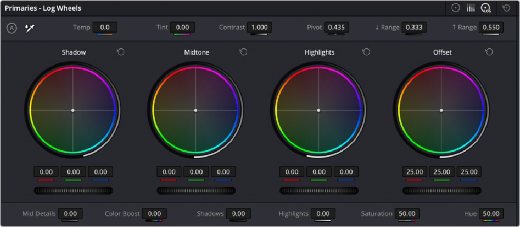
The available palettes are the Camera Raw palette (for making metadata adjustments to raw media formats), the Color Match palette (for creating automatic grades by sampling on-camera color charts), the Color Wheels (graphical color balance controls and master wheels or sliders for adjusting YRGB Lift/Gamma/Gain), HDR Grade for enhanced High Dynamic Range grading, the RGB Mixer (for mixing color channels into one another), and the Motion Effects palette (with controls for noise reduction and artificial motion blur).
Left palette selection buttons in the top bar