< Previous | Contents | Next >
Subclips give you another way of organizing media in the Media Pool, letting you break excessively long clips into shorter ones. For example, if the director of a project is fond of “rolling takes” where multiple takes are all recorded within a single clip, you can break these takes up by making them into subclips.
![]()
1 Select any clip in the Media Pool to open it into the Viewer.
2 Set In and Out points to define the section you want to turn into a subclip.
3 Do one of the following:
— Right-click the jog bar and choose Make Subclip.
— Drag a clip from the Viewer or Source Viewer into the Media Pool.
4 A new subclip dialog appears, allowing you to name the subclip and decide to use its full extents by turning on the checkbox.
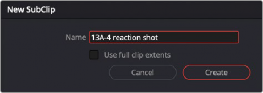
The New SubClip dialog
Once created, subclips appear and work like any other clip in DaVinci Resolve. You can also create subclips in the Media page while performing other organizational tasks there.
Removing or Changing Subclip Limits
Once created, you can right-click any subclip in the Media Pool or a timeline and choose Edit Subclip to open a dialog in which you can turn on a checkbox to use the subclip’s full extents, or to change the start or end timecode of the subclip via timecode fields, before clicking Update to modify the subclip.
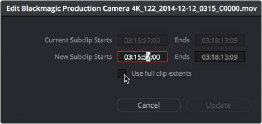
The Edit Subclip dialog