< Previous | Contents | Next >
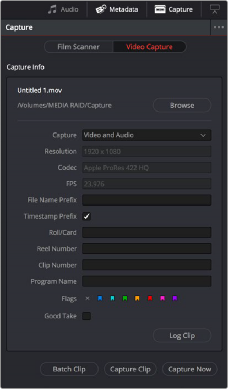
— Capture panel: The panel automatically switches to the Capture panel, with tape-specific metadata and capture controls. Populating File Name Prefix updates the file name preview that’s shown above in the Header, that also shows the Capture directory, Resolution, and Frame Rate specified in the Capture and Playback panel of the Project Settings.
Editable capture metadata
Setting Up to Capture From Tape
Before you begin capturing from tape, you need to adjust a variety of settings in the Capture and Playback panel of the Project Settings. Two groups of settings, in particular, need to be defined.
Deck Settings
These settings affect both capture and playback when using the Tape Ingest options of the Media page, or the Tape Output options of the Deliver page.
— Video capture and playback: You can choose the video format (frame size and frame rate) with which to output to tape from this drop-down menu. HD timelines can be downconverted to SD, and SD timelines can be upconverted to HD using the format conversion of your DeckLink card.
— Use left and right eye SDI: A checkbox that enables the Blackmagic Design DeckLink HD Extreme 3D+ to ingest and output muxed stereoscopic video when used with supported VTRs, such as HDCAM SR decks with 4:2:2 x 2 mode. (When muxed stereoscopic signals are ingested, each eye is separated into individual left-eye and right-eye image files.)
— Video connection operates as: Selects between the available signal options: Use 4:4:4 SDI
and Enable Single Link. Which options are available depend on which video capture card you are using.