< Previous | Contents | Next >
You can choose File > Quick Export to use one of a variety of export presets to export your program from any page of DaVinci Resolve. You can even use Quick Export to export and upload your program to one of the supported video sharing services, including YouTube, Vimeo, Twitter, and Dropbox.
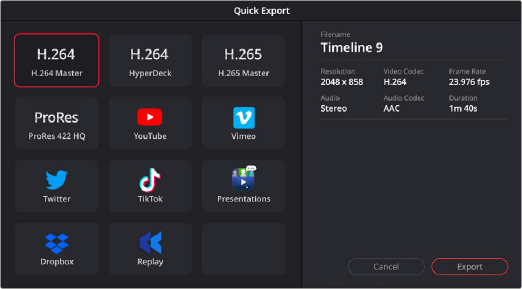
1 In the Cut, Edit, Fusion, or Color page, optionally set In and Out points in the Timeline to choose a range of the current program to export. If no timeline In or Out points have been set, the entire timeline will be exported.
2 Choose File > Quick Export or click the Quick Export icon at the upper right-hand corner of the Cut page.
3 Select a preset to use from the top row of icons in the Quick Export dialog, and click Export.
![]()
4 Choose a directory location and enter a file name using the Export dialog, then click Save. A progress bar dialog appears to let you know how long the export will take.

TIP: To use custom export options, you can use the Deliver page. For more information on creating custom presets for rendering, see Chapter 187, “Rendering Media.”
TIP: To use custom export options, you can use the Deliver page. For more information on creating custom presets for rendering, see Chapter 187, “Rendering Media.”
TIP: To use custom export options, you can use the Deliver page. For more information on creating custom presets for rendering, see Chapter 187, “Rendering Media.”
The Quick Export dialog