< Previous | Contents | Next >
Dragging a bin to a new position in the Bin list in User Sort mode
More About Timelines and Grading
![]()
DaVinci Resolve projects contain one or more edited timelines (sometimes called a sequence in other applications) which are also organized in the Media Pool, and displayed in the Timeline Editor (referred to as “the Timeline”). Timelines contain clips, the source media of which is kept in the Media Pool, and which also appear as edit events in the Edit Index that can be shown at the right of the Timeline.
Timelines, Grades, and Versions
Within any given timeline, grades are associated with the timecode of the source clip they’re applied to. That means that as you alter the timeline, each clip’s grade moves along with it, making it extremely easy to move back and forth between editing and grading as your needs require. By default, each timeline in a project has independent sets of grades using local versions; this is true even if your timelines are duplicates. That means each clip within every timeline has a completely independent grade.
However, if you switch the clips in one or more timelines to use Remote versions, a clip’s grades are shared by every instance of that clip in all timelines with clips that also use Remote versions. If you import a new timeline that rearranges clips into a different order and switch it to using Remote versions, then grades will automatically follow the clips, so that the clips within each new timeline inherits the grades applied to those same clips in other timelines.
You can switch a timeline between using Local and Remote grades at any time. For more information on using Local versus Remote versions, see Chapter 139, “Grade Management.” You can also copy grades from one timeline to another using the ColorTrace feature. For more information about ColorTrace, see Chapter 146, “Copying and Importing Grades Using ColorTrace.”
Enabling the Use of a Master Timeline
Previous versions of DaVinci Resolve had a Master Timeline, which consisted of one long timeline containing every clip in the Media Pool, arranged by default in ascending order by timecode. While the Master Timeline was useful for a variety of tasks, architectural improvements have rendered
it unnecessary, and by default the Master Timeline does not appear in new projects created by DaVinci Resolve version 10 or later.
However, if you want a Master Timeline in order to have a single timeline that always contains all clips currently in the Media Pool, there’s a way you can create one. You need to do it immediately upon creating a new project, before adding any media to the Media Pool. Once you’ve added one or more clips to the Media Pool, the option you need to do so will be disabled.
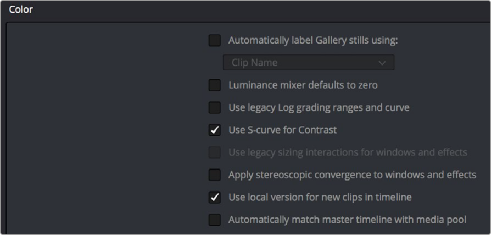
1 Create a new project, open the General Options panel of the Project Settings, and turn on the “Automatically match master timeline with media pool” checkbox. If you also want all clips to use Remote versions as you grade by default as in previous versions of DaVinci Resolve, you can turn off the “Use local version for new clips in timeline.”
![]()
The option to use a Master Timeline is in the Color section of the General Options panel of the Project Settings
2 Click Save to close the Project Settings window.
3 Open the Edit page, and choose File > New Timeline (Command-N).
4 When the New Timeline Properties window appears, turn the Empty Timeline checkbox off, and click Create New Timeline.

TIP: If you want to make sure that you always have a Master Timeline when you create new projects, you can alter the Project Setting preset for your user account to reflect these settings, or you can create a new Project Setting preset with these settings that you can easily switch to.
TIP: If you want to make sure that you always have a Master Timeline when you create new projects, you can alter the Project Setting preset for your user account to reflect these settings, or you can create a new Project Setting preset with these settings that you can easily switch to.
TIP: If you want to make sure that you always have a Master Timeline when you create new projects, you can alter the Project Setting preset for your user account to reflect these settings, or you can create a new Project Setting preset with these settings that you can easily switch to.
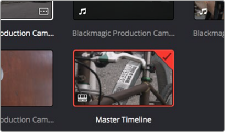
Now, in addition to the new timeline, a Master Timeline appears in the Timeline list.
Creating a Master Timeline