< Previous | Contents | Next >
Creating Timelines Using an IMF or DCP Composition Playlist (CPL)
You can create a timeline in DaVinci Resolve that exactly replicates the Composition Playlist (CPL) of a DCP or IMF package. This is currently a DaVinci Resolve Studio only feature.
1 Import an IMF or DCP package into the Media Pool, like any other piece of media.
2 Right-click on the imported clip and choose “Create New Timeline Using Composition Playlist” from the contextual menu.
3 In the New Timeline dialog box, choose a specific CPL from the package in the “Composition Playlist” drop-down menu.
4 Make any other normal new Timeline adjustments you may need (such as Resolution, Aspect Ratio, etc.), then click the “Create” button.
Duplicating Timelines
You can also duplicate existing timelines in preparation for saving a copy prior to making modifications, or as a starting point for a different version of your content.
![]()
— Select a timeline in the Media Pool, and choose Edit > Duplicate Timeline. The duplicate timeline appears with “copy” appended to the name.
— Right-click a timeline in the Media Pool, and choose Duplicate Timeline from the contextual menu.
Disabling Timelines
You can disable/enable timelines in the Media Pool for both performance and organizational purposes. This is particularly useful for editors who like to maintain a history of a program’s editing via an ongoing series of periodically duplicated timelines. Since having a large number of timelines within a single project file can affect performance, having the ability to disable timelines lets you maintain these backup/alternate timelines without any penalty.
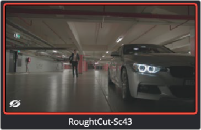
Disabled timelines are never loaded into RAM, have no effect on the speed at which a project opens, saves, exports, or loads, and have no effect on program performance. A disabled timeline also hides the timeline from the viewer drop-down menus throughout the program. Disabled timelines are
still visible in the Media Pool, but have a crossed out eye icon in the lower left to show the status. A disabled timeline cannot be opened in any page of DaVinci Resolve.
— Select the Timeline, right-click on it and choose “Disable Timeline” from the drop-down menu.
— Select the Timeline, right-click on it and choose “Enable Timeline” from the drop-down menu.


TIP: Enabled and Disabled timelines can be easily grouped and organized across the entire
project by creating a Smart Bin with the MediaPool Properties > Timeline fields, and choosing
“is Enabled/Disabled.”
TIP: Enabled and Disabled timelines can be easily grouped and organized across the entire
project by creating a Smart Bin with the MediaPool Properties > Timeline fields, and choosing
“is Enabled/Disabled.”
TIP: Enabled and Disabled timelines can be easily grouped and organized across the entire
project by creating a Smart Bin with the MediaPool Properties > Timeline fields, and choosing
“is Enabled/Disabled.”