< Previous | Contents | Next >
— Click on the Option menu in the upper right of the Transcription Window, and select Remove Silent Portions from the contextual menu.
Audio Transcription Supported Languages
You can choose which language is used to generate the transcription in the Project Settings > Subtitle and Transcription> Transcription Setup section. You can select any of the supported language models, or keep it on Auto for DaVinci Resolve to figure out who is speaking what.
As of this writing Audio Transcription and Text-Based Editing support the following languages:
— Danish, Dutch, English, French, German, Italian, Japanese, Korean, Mandarin (Simplified, Traditional), Norwegian, Portuguese, Russian, Spanish, and Swedish.
Text-Based Video Editing
After a Transcribe command has been applied, DaVinci Resolve now knows the exact timecode position of each word in the clip, and that information opens up several useful text-based editing tools using the Transcription Window. Text-based video editing is available in the both the Cut and Edit pages.
![]()
The cursor in the Transcription Window and the playhead in the Viewer are linked. As you move the cursor in the text, the playhead updates to that respective position in the clip in the Viewer. This allows you to precisely place the playhead exactly where you want it based on the text word, rather than having to scrub back and forth through the audio track.
— Click on a word in the Transcript Window, and it will highlight with a red arrow. The viewer playhead will then jump directly to the end of that word in the clip in the Viewer.
In addition to the cursor and playhead being linked, the In and Out points of a clip are also linked to the selected range of the text in the Transcription Window.
— Click and drag over the text in the Transcription Window to highlight it in teal. The In point of the clip is set just before the first word, and the Out point is set just after the last word in the highlighted text.
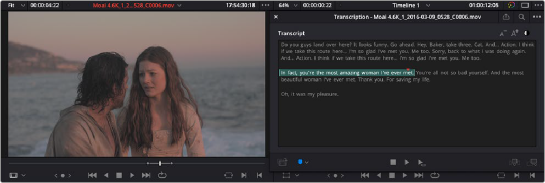
Selecting a text range in the Transcription window (R), automatically sets In and Out points for that range on the clip in the Viewer (L).
With an In and Out range set, you can now use the editing tools in the Transcription window to perform some common editing and media management functions.
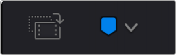
The Create Subclip and Add Marker tools in the Transcription window
1 Select a range of text in the Transcription window by clicking and dragging to highlight the text in teal.
2 Press the Create Subclip icon in the lower left of the Transcription window.
3 In the Create Subclip window, enter a new name for the subclip and select the Create button.
1 Either select a specific word in the Transcription window (red arrow) for a standard marker, or select a range of text by clicking and dragging to highlight the text in teal for a duration marker.
2 Click on the Marker icon in the lower left of the Transcription window.

![]()
The Insert and Append edit icons in the Transcription window
1 Select a range of text in the Transcription window by clicking and dragging to highlight the text in teal.
2 Click the Insert Edit icon in the lower right of the Transcription window to insert the selected range into the Timeline, or click on the Append icon to add the clip to the end of the Timeline.