< Previous | Contents | Next >
Using Keyboard Shortcuts and Three-Point Editing to Assemble a Program
While drag and drop editing is intuitive enough, there are other methods of editing clips into the Timeline by using the playhead to define where those clips will start that can be more efficient and precise. These examples all use “overwrite” edits, which delete unwanted media from the Timeline as you’re adding clips that you do want. Here are two examples of how to do this.
Example: Assembling Clips Into the Timeline From the Source Viewer
The following example shows how you can use the Edit page to assemble a quick first cut of edits using different features of the Media Pool, Viewers, and Timeline. Written out with every possible option, this may seem like a lot of steps, but once you learn these fundamentals and develop some muscle memory for the keyboard shortcuts in use, these methods become really fast to do.
![]()
1 Press Command-1 to open the Bin list, and use the Arrow keys to select a bin (Up and Down to change the selection, Right and Left to open and close bins). Then press Command-2 to choose the clip browser, and use the Arrow keys to select a specific clip.
2 Press the Return or Enter key to open the selected clip into the Source Viewer.
3 Drag the playhead with the pointer or use the Spacebar or JKL keys to move the playhead and set In and Out points (I and O) to define the section of that clip you want to edit into your program.
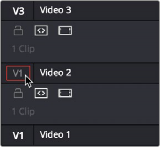
4 By default, the destination controls are assigned to tracks V1 and A1. If necessary, choose different video and audio tracks to edit the clip to in the Timeline by doing one of the following:
— Click the destination controls of the tracks you want to edit to. You can also drag them from where they are now to where you want them to be.
— Use the Command-Option Up and Down Arrow (for audio) and Command-Shift Up and Down Arrow (for video) shortcuts to move the destination controls up and down.
— Use the Option-1–8 (for video) and Command-Option-1–8 (for audio) key shortcuts to assign the video and audio destination controls to specific tracks.
5 By default, all destination controls are enabled. If you want to edit clips into the Timeline as audio or video only, you can do one of the following:
— Click any destination control itself to disable the video or audio component.
— Press Option-1–8 (for video) or Command-Option-1–8 (for audio) for the currently assigned tracks to toggle the destination controls on those tracks on and off.
Setting the destination control to the track you want to edit into.
6 In the Timeline Viewer or the Timeline itself, use the pointer, Spacebar, or JKL controls to move the Timeline playhead to the frame you want the beginning of the clip you’re about to edit to start. If no In or Out points are set in the Timeline, the playhead position is used as the In point by default.
7 To perform an overwrite edit, do one of the following:
— Drag the clip from the Source Viewer to the Timeline Viewer and drop it on the Overwrite overlay. If you’re in single viewer mode, this overlay only appears when you drag a clip from the Media Pool to the Timeline Viewer.
— Click the Overwrite Clip button in the toolbar.
— Choose Edit > Overwrite (or press F10).
![]()
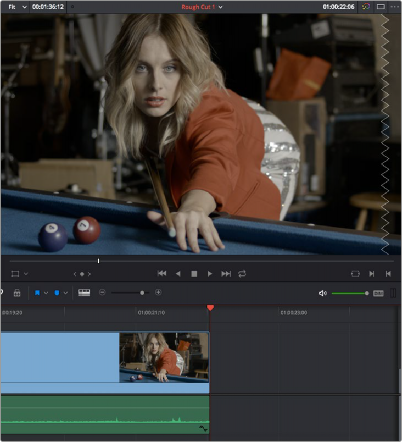
The selected clip(s) are overwritten to the selected track at the position of the playhead, and the playhead automatically moves to the end of the newly edited clip, ready for you to perform another edit. If that clip is the last one on the Timeline, you’ll see the last frame to the left of the playhead (with a jagged overlay at the right-hand side of the Timeline Viewer) instead of the black that is the actual frame after that clip. This makes it easier for you to line up the next edit. Otherwise, the playhead will show whatever frame happens to be at that point in time.
The Timeline playhead at the first frame after the clip you’ve just edited; the Timeline Viewer shows a jagged overlay at the right
to let you know this isn’t a real frame
8 To edit another clip, open the next clip you want to edit into the Source Viewer, set In and Out points, and use the Overwrite Clip button or command to edit it into the Timeline. Continue this process until you’ve edited together the assembly of edits you want.