< Previous | Contents | Next >
Copy and Paste Multiple Markers in the Viewers and Timeline
In the Edit page, you can select multiple markers by Shift or Command-Clicking them, or by dragging a boundary box. Once selected, these markers can be copied to the clipboard by pressing Command-C. They can then all be pasted into another clip, timeline, or compound clip at the playhead position by pressing Command-V.
If a timeline clip is selected for Paste, DaVinci Resolve will create clip markers on the clip. If no selection is made, DaVinci Resolve will make timeline markers instead.
This is useful to make sure critical marker information is easily sharable between various iterations of media across timelines. The copy and paste operations can be done in either the Source and Timeline Viewers, or in the Timeline itself.
Drawn Annotations on the Viewer
![]()
It’s now possible to use the Annotations mode of the Timeline Viewer to draw arrows and strokes of different weights and colors directly on the video frame, in order to point out or highlight things that need to be fixed. These annotations are stored within markers, similarly to marker names and notes. To start, simply choose Annotations mode from the Timeline Viewer mode drop-down menu.
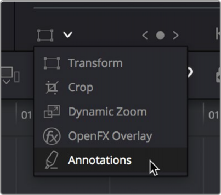
Choosing Annotations from the Viewer Mode drop-down menu
Once in Annotations mode, an Annotations toolbar appears showing the following options:
![]()
The Annotations toolbar in the Viewer
![]()
![]()
![]() Line Tool: Click the Line tool to draw straight lines on the Viewer.
Line Tool: Click the Line tool to draw straight lines on the Viewer.
![]()
![]() Rectangle Tool: Click the Rectangle tool to draw boxes on the Viewer.
Rectangle Tool: Click the Rectangle tool to draw boxes on the Viewer.
— To create an annotation: Simply enable Annotations mode, then park the playhead on any frame of the Timeline and start drawing. A marker will automatically be added to the Timeline at that frame, and that marker contains the annotation data. If you park the playhead over a preexisting timeline marker, annotations will be added to that marker.
![]()
— To edit a stroke or arrow you’ve already created: Move the pointer over a stroke or arrow and click to select it, then choose a new line weight or color from the appropriate drop-down menu, or drag that stroke or arrow to a new location to move it.
— To delete a stroke or arrow: Move the pointer over a stroke or arrow and click to select it, then press the Delete or Backspace keys.
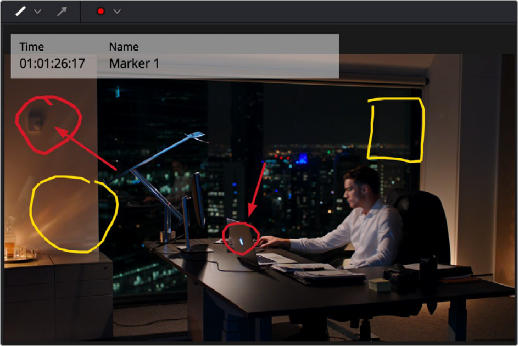
Drawing annotations to highlight feedback