< Previous | Contents | Next >
Once you’ve added a number of markers with custom information, there are two ways of viewing this information without having to open the marker dialog.
— Double-click a marker to open its marker dialog.
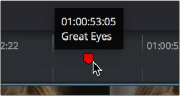
— Move the pointer over any marker in the Source Viewer or Timeline to see a tooltip showing that marker’s information.
Moving the pointer over a marker displays its information in a tooltip
1 Open the Source or Timeline Viewer’s option menu, and turn on Show Marker Overlays.
![]()
2 Stop playback, and move the playhead to a marker. That marker’s information is displayed in the Viewer, superimposed.

Marker information shown in the Source Viewer
Using Markers for Navigation
Markers can be used to aid navigation, via two keyboard shortcuts that let you jump the playhead from marker to marker. When moving the playhead among markers, Clip and Timeline markers are mixed together.
— Press Shift-Up Arrow to move the playhead to the next marker to the left in the Timeline.
— Press Shift-Down Arrow to move the playhead to the next marker to the right in the Timeline. The marker under the playhead is then automatically selected.
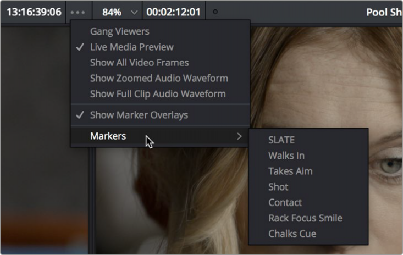
— For a source clip or timeline with multiple markers, you can move the playhead immediately to a specific marker by opening the Source or Timeline Viewer’s Option menu, and choosing a marker from the Markers submenu, which exposes all the markers that are available in that Viewer, by name and note.