< Previous | Contents | Next >
Also, if snapping is enabled, it may be impossible to make a subframe adjustment if you’re too close to another edit point, a marker, or the playhead. In this case, pressing the N key to turn snapping off will solve the problem.
Eliminating Subframe Audio Edits
If you’ve done a variety of subframe edits and you discover you need to eliminate these subframe adjustments, you can choose Timeline > . This moves each subframe edited In or Out point in the timeline to the nearest frame boundary.
Audio Settings in the Inspector
Each clip has some simple audio-related parameters in the Audio panel of the Inspector.
— Volume: Each clip has a single volume control that corresponds to the volume overlay over each audio clip.
— Pan: (Only exposed for clips) A simple Pan slider that controls stereo panning.
— Pitch: Lets you alter the pitch of a clip without changing the speed. Two sliders let you adjust clip pitch in semi tones (large adjustments, a twelfth of an octave) and cents (fine adjustments, 100th of a semi tone).
![]()
— Equalizer: Each clip also has a four-band EQ, complete with low-pass, high-pass, and parametric settings for fine tuning and problem-solving audio issues at the clip level.
Additionally, when you apply other audio plugins from the Audio FX panel of the Effects Library, additional parameters and controls are exposed (covered towards the end of this chapter).
Setting Volume
Each audio clip, or audio item in the case of audio clips with linked audio on multiple tracks, has its own Volume level. This means that audio clips with multiple channels share a common Volume setting. There are several ways you can adjust these levels simply.
Adjusting Audio in the Inspector
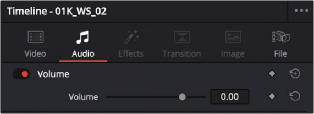
Each clip has individual Volume parameters that are accessible in the Audio panel of the Inspector when one or more audio clips are selected.

The Volume parameter available for audio clips in the Inspector