< Previous | Contents | Next >
You can also optionally use curves to retime clips, either in conjunction with the Retime controls, or by themselves. For example, you can use the simpler retiming controls first to create the overall speed effect you need, and then use either of the available Retime Curves to create further refinements by adjusting Bezier curve handles to adjust the transition of one speed to another, or you can expose either of the Retime Curves first and use it to create your speed effect from scratch by adding and adjusting control points and curve segments.
![]()
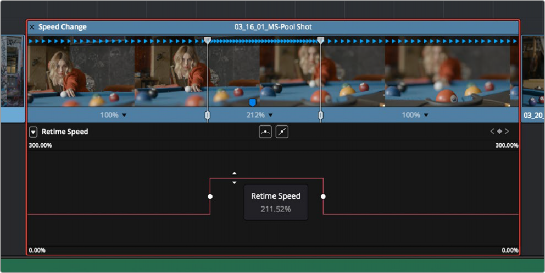
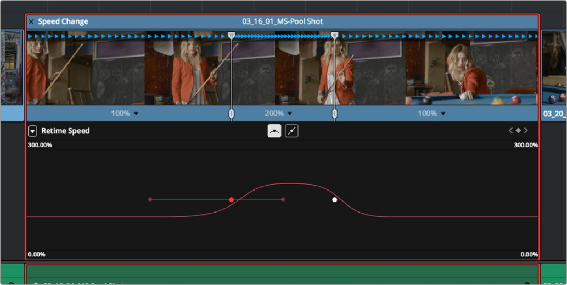
The Retime Curves let you adjust the transition from one speed to another using handles
No matter how you like to work, the control points of each of the speed curves have a 1:1 correspondence to the speed points that are exposed in the Retime controls, and curve segment modifications are mirrored by speed point adjustments in the Retime controls if you have both exposed at the same time. This means that, when creating complex variable retiming effects, it’s easy to drag whichever control most easily adjusts the quality of speed you require.
In addition, there are two kinds of Retime curves you can use for maximum flexibility. Which is best depends on what you’re more comfortable with, and on which will handle the type of motion you want to create more easily:
— The Retime Frame curve exposes a diagonal line that represents a time graph. This is a type of curve found in many other post-production applications, in which the vertical axis represents each frame of that clip’s source media, and the horizontal axis represents each frame of playback in the Timeline. With the default diagonal graph, there is a one-to-one correspondence between each frame of source media and each frame of timeline playback; this represents 100% speed. However, adding control points lets you alter how source frames are mapped to the Timeline. For any two control points on the Retime Frame curve, so long as the control point at the left is lower than the control point at the right of a curve segment, there will be forward motion, with longer shallow curve segments creating slower motion, and steeper shorter curve segments creating faster motion in the clip.
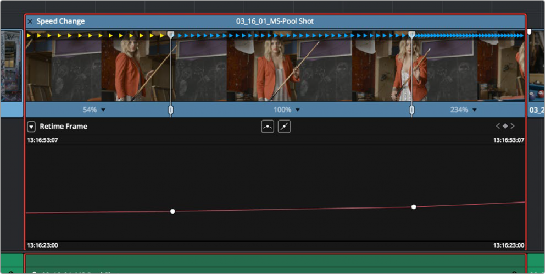
A diagonal Retime Frame curve with two segments: a long shallow segment to the left that creates slow motion, and a short steep segment to the right that creates fast motion
![]()
— If a curve segment has a left control point that’s higher than the right control point, then the motion will be reversed and that segment will play backward.
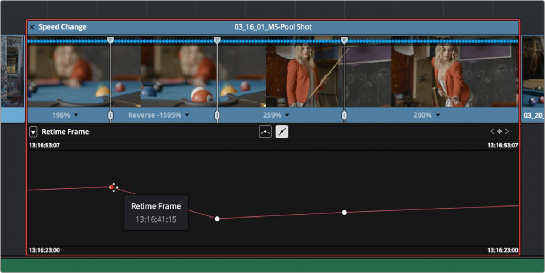
A Retime Frame curve with an inverted curve that creates reverse motion
— The Retime Speed curve (seen below) exposes a flat line that represents 100% speed. Adding pairs of control points and dragging each segment to raise or lower it alters speed; you must drag the segments, not the control points themselves. Raising a curve segment shortens that segment and speeds up that portion of the clip, while lowering a curve segment lengthens that segment and slows down that portion of the clip. As you adjust each curve segment, a tooltip shows you the exact speed percentage that segment represents. You should note that it’s impossible to create reverse motion using the Retime Position curve; you need to use either the Retime controls or the Retime Speed curve described above.