< Previous | Contents | Next >
— To delete all keyframes in a group of parameters in the Inspector: Click the reset button to the right of a parameter group’s title bar in the Inspector.
— To disable or enable a single parameter’s keyframed effect: In the Timeline, click the toggle control at the left of a parameter’s keyframe track. White means that track’s enabled. Gray is disabled.
— To disable or enable a group of parameters in the Inspector: Click the toggle control at the left of a parameter group’s title bar in the Inspector. Orange means that group is enabled. Gray is disabled.
Keyframing Motion Paths in the Timeline Viewer
![]()
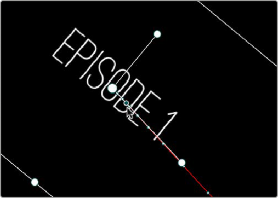
If you’re keyframing a clip’s transform controls to create motion, a motion path appears when you turn on the onscreen transform controls using the button to the left of the transport controls.
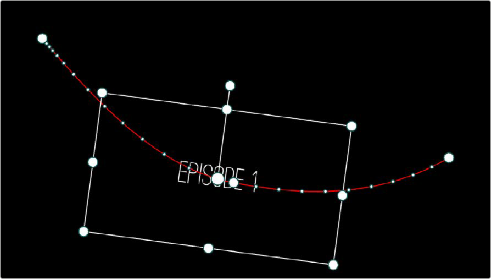
A visible motion path resulting from animated Position X and Y parameters
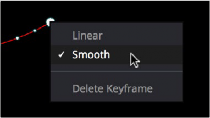
Each keyframed change to the Position X and Y parameters creates a control point on the surface of the motion path, which is linear by default, creating a sharp edge. However, you can right-click any control point and choose Smooth from the contextual menu to add Bezier handles to that control point, which let you change the sharp angle to an adjustable curve.
Changing the linear control point into a Bezier curve
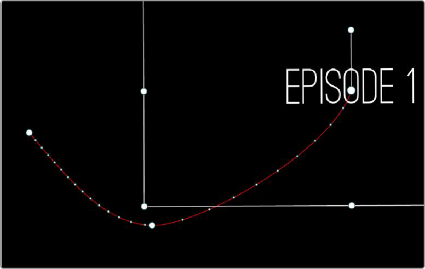
The control points making up any motion path can be dragged around at will to change the path the selected clip will travel. Dots on the surface of the motion path indicate the velocity of motion; dots that are closer together indicate slower motion, while dots that are farther apart indicate faster motion. Dragging a motion path control point farther away from another one will speed up the animation between both points, while dragging it closer will slow the animation down, as you’re setting up the selected clip to travel a longer or shorter distance within the same keyframed time.
![]()
Dots on the motion path show that the left half has slow motion, while the right half has faster motion
You can also adjust the shape of any control point’s curve by clicking to select that control point, which exposes its Bezier handles, and then dragging the handles to adjust its curve. Once handles have been exposed, there are a variety of methods you can use to adjust them and manipulate the motion path.
Finally, you can adjust the acceleration of motion by adjusting the Acceleration handle on the stem of any Bezier curve. Dragging an acceleration handle towards a control point creates an eased
keyframe, where motion slows to a stop, or begins from a stop. Dragging an acceleration handle away from a control point creates more linear motion, where the object moves continuously through that control point.
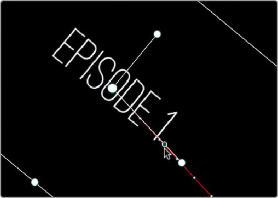
An acceleration handle on the Bezier handle of a curve lets you create eased motion by dragging it in towards the control point being adjusted