< Previous | Contents | Next >
Step 5–Render Graded Media and Export a New AAF
1 When you’re ready to send a graded project back to Media Composer, select the Timeline you graded and open the Deliver page.
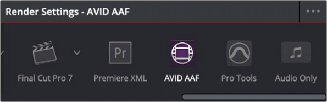
2 Choose “Avid AAF” from the Presets at the top of the Render Settings to load its settings.
Selecting the Avid AAF setup for round-trip
3 In the Format section, choose the MXF codec you want to render to.
4 In the File section, choose the appropriate file destination path for the rendered media. The location you choose depends on whether Media Composer and DaVinci Resolve are on the same computer or not.
![]()
— If Media Composer and DaVinci Resolve are on the same computer: Create a new folder within your Avid MediaFiles folder (Avid MediaFiles/MXF/) named with a number. Make sure you choose a previously unused number.
— If DaVinci Resolve is on a different computer using different storage: Select any directory on the portable hard drive you’ll be using to bring the media back to the Media Composer workstation from which it came.
5 If you require handles for your rendered output, you can add handles in the Advanced Settings of the Video tab. When making any changes to the File render settings, make sure to leave
the “Render Clip with Unique Filename” checkbox turned on to ensure that each clip rendered has a different file name as multiple clips in the edited sequence may originate from the same source clip.
6 In the Timeline, click Select Entire Timeline to select the entire Timeline for delivery, and then click Add to Render Queue at the bottom of the Render Settings to add the job you’ve set up to the Render Queue.
7 Click Start Render at the bottom of the Render Queue to initiate rendering.
The project renders, and an AAF is automatically exported to the same directory as the media you’ve rendered.
Step 6–Copy the Graded Media to Avid MediaFiles
1 For workflows where DaVinci Resolve and Media Composer are on separate workstations, locate the media directory containing the media files that were rendered out of DaVinci Resolve on the portable hard drive being used to transport the project back to your Avid workstation, and copy it into the Avid MediaFiles/MXF/ directory.
2 Rename the directory to be a number. Make sure you choose an unused number.