< Previous | Contents | Next >
Choosing Which Panel Has Focus
Whenever you click somewhere on the Fusion interface using the pointer or using a keyboard shortcut to “select” a particular panel, you give that panel of the user interface “focus.” A panel with focus captures specific keyboard shortcuts to do something within that panel, as opposed to doing something elsewhere in the interface.
To make it easier to keep track of which panel has focus, a highlight appears at the top edge of whichever panel has focus. In DaVinci Resolve, you must turn on “Show focus indicators in the User Interface” in the UI Settings panel of the User Preferences to see the highlight.
The focus indicator shown at the top edge of the Media Pool, shown next to a viewer that doesn’t have focus
Viewers
The viewer area displays either one or two viewers at the top of the Fusion page, and this is determined via the Viewer button at the far right of the Viewer title bar. Each viewer can show a single node’s output from anywhere in the node tree. You assign which node is displayed in which viewer.
![]()
This makes it easy to load separate nodes into each viewer for comparison. For example, you can load a Keyer node into the left viewer and the final composite into the right viewer, so you can see the image you’re adjusting and the final result at the same time.
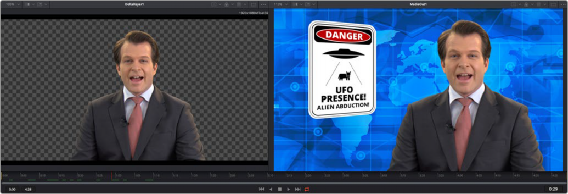
Dual viewers let you edit an upstream node in one while seeing its effect on the overall composition in the other.
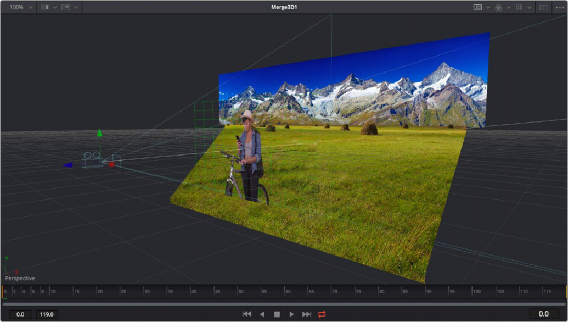
Ordinarily, each viewer shows 2D nodes from your composition as a single image. However, when you’re viewing a 3D node, you have the option to set that viewer to one of several 3D views. A perspective view gives you a repositionable stage on which to arrange the elements of the world you’re creating. Alternatively, a quad view lets you see your composition from four angles,
making it easier to arrange and edit objects and layers within the XYZ axes of the 3D space in which you’re working.