< Previous | Contents | Next >
![]()
![]()
![]()
![]()
Versioning Nodes
Each button is capable of containing separate parameter settings for that node, making it easy to save and compare up to six different versions of settings for each node. All versions are saved along with the node in the Node Editor for future use.

![]()
The Version bar, underneath an Inspector header, with versions enabled
An orange underline indicates the currently selected version, which is the version that’s currently being used by your composition. To clear a version you don’t want to use any more, right-click that version number and choose Clear from the contextual menu.
Parameter Tabs
Underneath the Inspector header is a series of panel tabs, displayed as thematic icons. Clicking one of these icons opens a separate tab of parameters, which are usually grouped by function. Simple nodes, such as the Blur node, consist of two tabs where the first contains all of the parameters relating to blurring the image, and the second is the Settings tab.
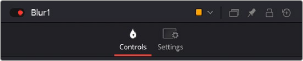
The parameter tabs of the Blur node