< Previous | Contents | Next >
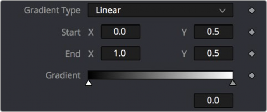
The Gradient Control bar is used to create a gradual blend between colors. The Gradient bar displays a preview of the colors used from start to end. By default, there are two triangular color stops: one on the left that determines the start color, and one on the right that determines the end color.
The default Gradient controls
Gradient Type
The Gradient Type button array is used to select the form used to draw the gradient. Linear draws the gradient along a straight line from the starting color stop to the ending color stop.
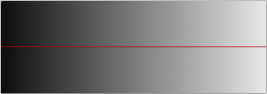
Linear gradient
Reflect draws the gradient by mirroring the linear gradient on either side of the starting point.
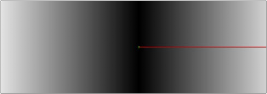
Reflect gradient
Square draws the gradient by using a square pattern when the starting point is at the center of the image.
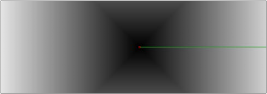
Square gradient
Cross draws the gradient using a cross pattern when the starting point is at the center of
the image.
Cross gradient
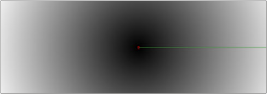
Radial draws the gradient in a circular pattern when the starting point is at the center of
the image.
![]()
Radial gradient
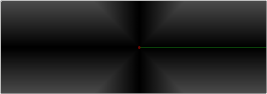
Angle draws the gradient in a counter-clockwise sweep when the starting point is at the center of the image.

Angle gradient
Start and End Position
The Start and End Position controls have a set of X and Y edit boxes that are useful for fine-tuning the start and end position of the gradient. The position settings are also represented by two crosshair onscreen controls in the viewer, which may be more practical for initial positioning.

Gradient Colors Bar
The Gradient Colors bar is used to select the blending colors for the gradient. The default two color stops set the start and end colors. You can change the colors used in the gradient by selecting the color stop, and then using the Eyedropper or color wheel to set the new color.
You can add, move, copy, and delete colors from the gradient using the Colors bar.
1 Click anywhere along the bottom of the Gradient Colors bar.
2 Use the Eyedropper or color wheel to set the color for the color stop.
— Drag a color stop left or right along the Gradient Color bar.
— Hold Command while you drag a color stop.
— Drag the color stop up past the Gradient Colors bar.
— Select the color stop, then click the red X button to delete it.
Interpolation Space
The Gradient Interpolation Method pop-up menu lets you select what color space is used to calculate the colors between color stops.
Offset
![]()
When you adjust the Offset control, the position of the gradient is moved relative to the start and end markers. This control is most useful when used in conjunction with the repeat and ping-pong modes described below.
Once/Repeat/Ping-Pong
These three buttons are used to set the behavior of the gradient when the Offset control scrolls the gradient past its start and end positions. The Once button is the default behavior, which keeps the color continuous for offset. Repeat loops around to the start color when the offset goes beyond the end color. Ping-pong repeats the color pattern in reverse.
1x1, 2x2, 3x3, 4x4, 5x5
These buttons control the amount of sub-pixel precision used when the edges of the gradient become visible in Repeat mode, or when the gradient is animated. Higher settings will take significantly longer to render but will be more precise.
Gradient Contextual Menu
Gradients have their own contextual menu that you can bring up by right-clicking on the Gradient bar. In the Gradient contextual menu are options for animating, publishing, and connecting one gradient to another. There is also a gradient-specific modifier that builds a custom gradient by sampling colors from the output of a node in the Node Editor.