< Previous | Contents | Next >
the root nodes. For example, if the node tree starts with a background node, and then connects to a Fast Noise, Blur, and Color Corrector, the background node will always appear at the top of the Keyframes Editor track list because it is the root node.
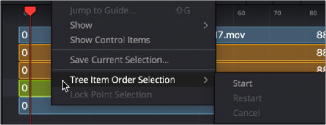
The Keyframes Editor Tree Item Order Selection menu
If you begin numbering nodes in the track header and change your mind or decide on a different order, you can choose Restart to begin numbering again or choose Cancel to keep the current order.
The Sort Menu
The Sort menu reorders how the layers of each node appear in the Keyframes Editor. Setting the menu back to All Tools will display them in a linear order, scanning the Node Editor from left to right and top to bottom. This is the default setting.

![]()
The Timeline Sort Order menu
— All Tools: Forces all tools currently in the Node Editor to be displayed in the Keyframes Editor.
— Hierarchy: Sorts with the most background layers at the top of the header, through to the most foreground layers at the bottom, following the connections of the nodes in the Node Editor.
— Reverse: The opposite of Hierarchy, working backward from the last node in the Node Editor toward the most background source node.
— Names: Sorts by the alphabetical order of the nodes, starting at the top with the beginning of the alphabet.
— Start: Orders layers based on their starting point in the composition. Nodes that start earlier in the Global project time are listed at the top of the header, while nodes that start later are at the bottom.
— Animated: Restricts the Timeline to showing animated layers only. This is an excellent mode to use when adjusting the timing of animations on several nodes at once.