< Previous | Contents | Next >
On occasion, it is not desirable to have any interpolation between two keyframes. Instead, the value of one keyframe may hold its value until another keyframe changes it. For these cases, use the Step In or Step Out mode.
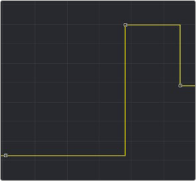
Step In causes the value of the previous keyframe to hold, then jump straight to the value of the next keyframe.
Step In holds a value until the next keyframe is reached in the comp
![]()
Step Out causes the value of the selected keyframe to hold right up to the next keyframe.
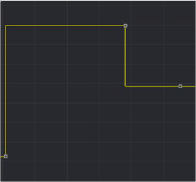
Step Out switches immediately to the next keyframe value in a comp
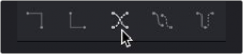
Step In and Step Out modes can be set for selected keyframes by clicking on the toolbar buttons for each mode, or by right-clicking and choosing the appropriate option from the contextual menu. The keyboard shortcuts I and O can also be used to enable Step In and Step Out on selected keyframes.
Reversing Splines
Reverse inverts the horizontal direction of a segment of an animation spline. To apply reverse, choose a group of points in a spline and click the Reverse button, or right-click and choose Reverse from the contextual menu, or press the V key. The group of points is immediately mirrored horizontally in the graph. Points surrounding the reversed selection may also be affected.