< Previous | Contents | Next >
Editing Parameters in the Inspector
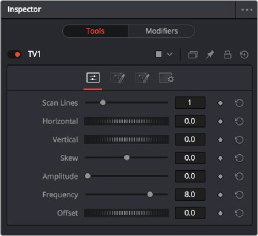
To improve an effect, you can make an adjustment to a node’s parameters in the Inspector at the right. The selected node shows its controls in the Inspector, in which most nodes have several tabs of controls seen as little icons just underneath that node’s title bar.
The Inspector showing the parameters of the TV effect
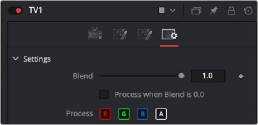
Clicking the last panel on any node opens the Settings panel. Every node has a Settings panel, and this is where the parameters that every node shares, such as the Blend slider and RGBA buttons, are found. These let you choose which image channels are affected, and let you blend between the effect and the original image.
![]()
The Settings panel, which includes channel limiting and mask handling controls that every node shares
In the case of the TV effect, for example, the resulting image has a lot of transparency because the scan lines being added are also being added to the alpha channel, creating alternating lines of transparency. Turning off the Alpha checkbox results in a more solid image, while opening the
Controls tab (the first tab) and dragging the Scan Lines slider to the right to raise its value to 4 creates a more visible television effect.
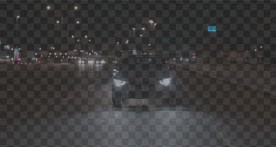
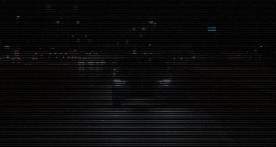
The original TV effect (left), and modifications to the TV effect to make the clip more solid (right)