< Previous | Contents | Next >
In the Effect category of the Effects Library, you’ll also find a Highlight node that adds glints to the highlights of an image.
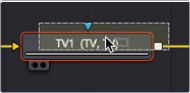
Instead of clicking the Highlight node, which would add it after the currently selected node, dragging and dropping a node from the Effects Library on top of a node in the Node Editor replaces the node in the Node Editor.
Dragging a node from the Effects Library onto a node in the Node Editor to replace it
In our example, the Highlight1 node takes the TV node’s place in the node tree, and the new effect can be seen in the viewer, which in this example consists of star highlights over the lights in the image.
It’s time to use the Inspector controls to customize this effect.
Adjusting Fusion Sliders
When you drag a slider in the Fusion Inspector—in this case, the Number of Points slider—a little dot appears underneath it. This dot indicates the position of the default value for that slider and also serves as a reset button if you click it.

![]()
Adjusting a slider reveals a reset button underneath it
Each slider is limited to a different range of minimum and maximum values that is particular to the parameter you’re adjusting. In this case, the Number of Points slider maxes out at 24. However, you can remap the range of many (but not all) sliders by entering a larger value in the number field to the right of that slider. Doing so immediately repositions the slider’s controls to the left as the slider’s range increases to accommodate the value you just entered.

Entering a larger value to expand the range over which a slider will operate