< Previous | Contents | Next >
Using the Tracker as a Modifier
Another technique for adding a tracker directly to a control is to add it as a modifier. Choosing the Tracker from the Modify With contextual menu does not use a Tracker node; it adds a modifier in the Inspector with a set of parameters almost identical to those found in the Tracker node itself. The benefit here is that the object that you want to follow the tracked path is automatically connected to the tracker modifier when you apply it.
Applying the tracker as a modifier
— The Tracker modifier can only track a single pattern.
— A source image must be set for the Tracker modifier.
![]()
The Tracker modifier can only output a single value and cannot be used for complex stabilization procedures, but it is a nice quick way to apply a tracker to a point that you need to follow.
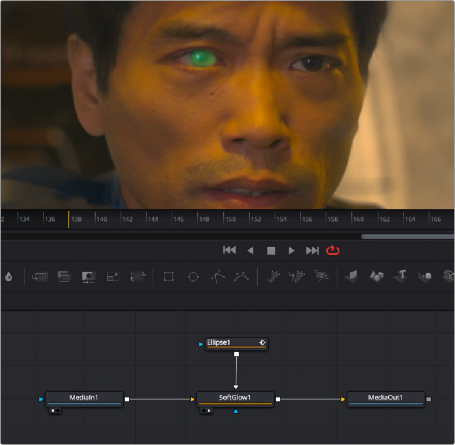
Imagine that you needed to track an actor’s eyes so that an unearthly, alien glow could be applied to the eyes.
1 Add an ellipse mask node to cover an actor’s eye.
2 In the Inspector, right-click on the mask’s Center parameter and from the contextual menu choose Ellipse1 Center > Modify With > Tracker Position.
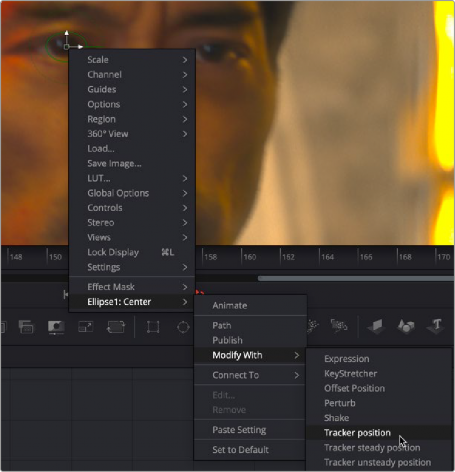
Right-click over any Center Coordinate Control and choose Modify With > Tracker Position to add a Tracker modifier
![]()
3 Click the Modifiers tab in the Inspector and drag the MediaIn1 node that you want to track into the Tracker Source field.
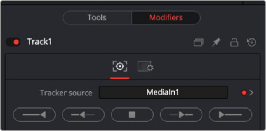
The Modifiers tab includes the tracking controls and a Tracker Source field to indicate which node to use for tracking
4 Click the Track Forward button to begin tracking the person’s eye.
5 Insert a Soft Glow node directly after the MediaIn and connect the Ellipse Mask to the white Glow Mask input.