< Previous | Contents | Next >
Suppose, for instance, that you have a scene on a street corner, and there’s a shop sign with a phone number on it, but you want to change the numbers. If you track the scene and have standing
geometry for the sign, you can project the footage onto it, do a UV render, switch the numbers around with a Paint node, and then apply that back to the mesh with a Texture2D.
The UV renderer can also be used for retouching textures. You can combine multiple DSLR still shots of a location, project all those onto the mesh, UV render it out, and then retouch the seams and apply it back to the mesh.
You could project tracked footage of a road with cars on it, UV render out the projection from the geometry, do a temporal median filter on the frames, and then map a “clean” roadway back down.
Loading 3D Nodes into the Viewer
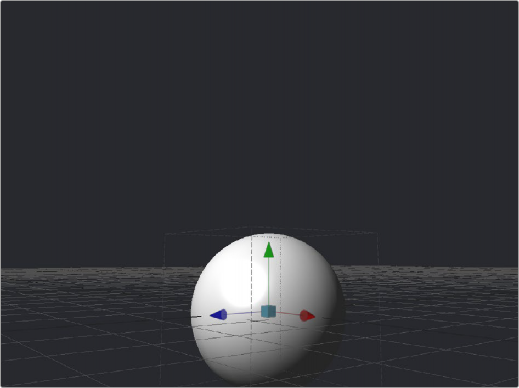
When you load a 3D node into the viewer, it switches to a 3D Viewer, which lets you pan, zoom, and rotate the scene in 3D, making it easy to make adjustments in three dimensions.
![]()
The 3D Viewer
The interactive 3D Viewer is highly dependent on the computer’s graphics hardware, relying on support from OpenGL. The amount of onboard memory, as well as the speed and features of your workstation’s GPU, make a huge difference in the speed and capabilities of the 3D Viewer.
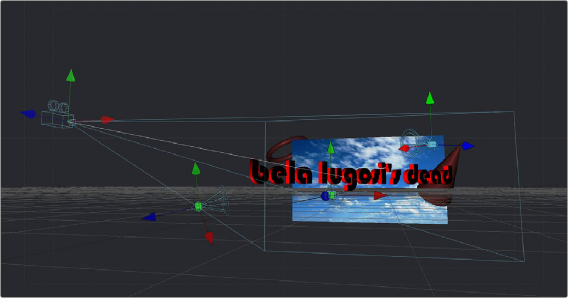
Displaying a node with a 3D output in any viewer will switch the display type to a 3D Viewer. Initially, the contents of the scene will be displayed through a default perspective view.
A 3D Viewer’s default perspective view
![]()
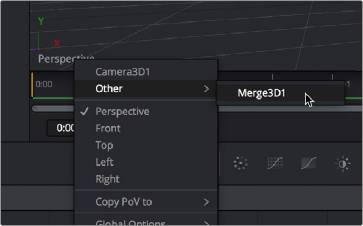
To change the viewpoint, right-click in the viewer and choose the desired viewpoint from the ones listed in the Camera submenu. A shortcut to the Camera submenu is to right-click on the axis label displayed in the bottom corner of the viewer.
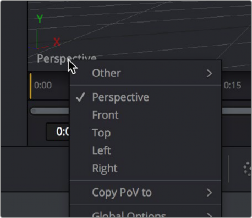
Right-click the Axis label of the viewer to change the viewpoint
In addition to the usual Perspective, Front, Top, Left, and Right viewpoints, if there are cameras and lights present in the scene as potential viewpoints, those are shown as well. It’s even possible to display the scene from the viewpoint of a Merge3D or Transform3D by selecting it from the contextual menu’s Camera > Other submenu. Being able to move around the scene and see it from different viewpoints can help with the positioning, alignment, and lighting, as well as other aspects of your composite.