< Previous | Contents | Next >
Since different 3D applications use different units to measure their 3D scenes, the imported geometry may be enormous compared to the rest of the scene, because Fusion treats its scale of measurement as equal to its own system. For example, if your 3D application defaults to using millimeters as its scale, an object that was 100 millimeters in size will import as a massive 100 units.
You can use the Size slider in the FBX Mesh Inspector parameters to reduce the scale of such files to something that matches Fusion’s 3D scene.
FBX Exporter
You can export a 3D scene from Fusion to other 3D packages using the FBX Exporter node. On render, it saves geometry, cameras lights, and animation into different file formats such as .dae or .fbx. The animation data can be included in one file, or it can be baked into sequential frames. Textures and materials cannot be exported.
Using Text3D
The Text3D node is probably the most ubiquitous node employed by motion graphics artists looking to create titles and graphics from Fusion. It’s a powerful node filled with enough controls to create nearly any text effect you might need, all in three dimensions. This section seeks to get you started quickly with what the Text3D node is capable of. For more information, see Chapter 89, “3D Nodes,” in the DaVinci Resolve Reference Manual or Chapter 27 in the Fusion Reference Manual.
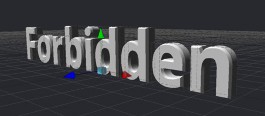
Assembling Text Objects
![]()
Each Text3D node is a self-contained scene within which each character of text is an individual object. Because of this, the ideal way to combine numerous text objects that you might want to animate or style independently from one another is to connect as many Text3D objects as you want to be able to independently animate or style to one or more Merge3D nodes.
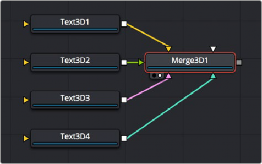

TIP: If you click the Text icon in the toolbar to create a Text3D node, and then you click it again while the Text3D node you just created is selected, a Merge3D node is automatically created and selected to connect the two. If you keep clicking the Text icon, more Text3D nodes will be added to the same selected Merge3D node.
TIP: If you click the Text icon in the toolbar to create a Text3D node, and then you click it again while the Text3D node you just created is selected, a Merge3D node is automatically created and selected to connect the two. If you keep clicking the Text icon, more Text3D nodes will be added to the same selected Merge3D node.
TIP: If you click the Text icon in the toolbar to create a Text3D node, and then you click it again while the Text3D node you just created is selected, a Merge3D node is automatically created and selected to connect the two. If you keep clicking the Text icon, more Text3D nodes will be added to the same selected Merge3D node.
Merging multiple text objects to create an intricately styled scene
Entering Text
When you select a Text3D node and open the Inspector, the Text tab shows a “Styled Text” text entry field at the very top into which you can type the text you want to appear onscreen. Below, a set of overall styling parameters are available to set the Font, Color, Size, Tracking, and so on. All styling you do in this tab affects the entire set of text at once, which is why you need multiple text objects if you want differently styled words in the same scene.
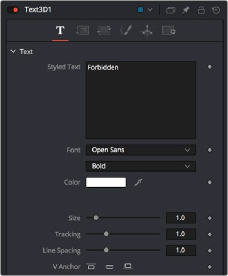
The text entry and styling parameters in the Text tab
![]()
Near the bottom of the Text tab are the Extrusion parameters, available within a disclosure control.
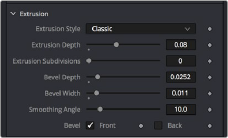
The Extrusion parameters near the bottom of the Text tab
By default, all text created with the Text3D node is flat, but you can use the Extrusion Style, Extrusion Depth, and various Bevel parameters to give your text objects thickness.
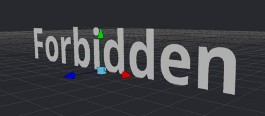
Unextruded text (left), and Extruded text (right)
Positioning and Transforming Text
By default, every new Text3D node is positioned at 0, 0, 0, so when you add multiple Text3D nodes, they’re all in the same place. Fortunately, every Text3D node has built-in transform controls in the Transform tab.
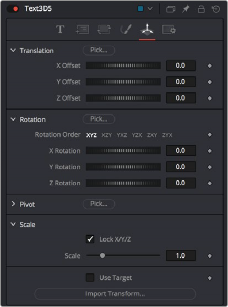
Text3D nodes also have Transform parameters built-in
![]()
Additionally, selecting a Text3D node exposes all the onscreen transform controls discussed elsewhere in this chapter. Using these controls, you can position and animate each text object independently.
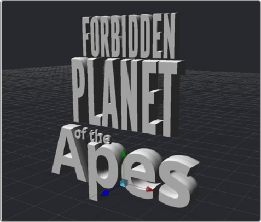
Repositioned text objects to create a title sequence
Combining Text3D nodes using Merge3D nodes doesn’t just create a scene; it also enables you to transform your text objects either singly or in groups:
— Selecting an individual Text3D node or piece of text in the viewer lets you move that one text object around by itself, independently of other objects in the scene.
— Selecting a Merge3D node exposes a transform control that affects all objects connected to that Merge3D node at once, letting you transform the entire scene.
Layout Parameters
The Layout tab presents parameters you can use to choose how text is drawn: on a straight line, a frame, a circle, or a custom spline path, along with contextual parameters that change depending on which layout you’ve selected (all of which can be animated).
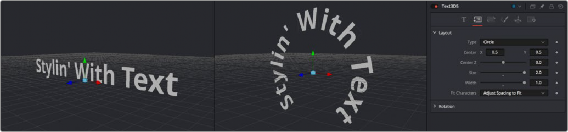
Text using two different layouts
“Sub” Transforms
Another Transform tab (which the documentation has dubbed the “Sub” Transform tab) lets you apply a separate level of transform to either characters, words, or lines of text, which lets you create even more layout variations. For example, choosing to Transform by Words lets you change the spacing between words, rotate each word, and so on. You can apply simultaneous transforms to characters, words, and lines, so you can use all these capabilities at once if you really need to go for it. And, of course, all these parameters are animatable.
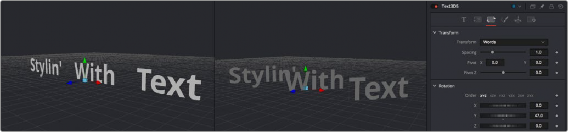
![]()
Transforming individual words in two different ways
Shading
The Shading tab lets you shade or texture a text object using standard Material controls.
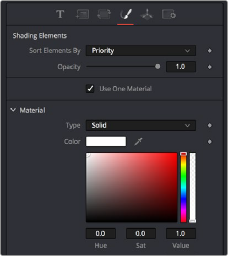
Shading controls for text objects