< Previous | Contents | Next >
When performing a track, you can enable the Bidirectional Tracking checkbox, which first tracks forward from the start of the clip, and then tracks a second pass in reverse. This two-pass approach can potentially extend the duration of any given point by re-analyzing points initially identified in the forward pass. There is very little reason not to have this enabled unless you are very short on time. Bidirectional tracking takes longer, but it’s usually worth it, and the process is reasonably quick considering the benefit.
Choosing a Tracking Algorithm
There are three available choices for the algorithm to use when tracking. The three options in the New Track Defaults section of the Inspector include:
— Optical Flow: Usually your best choice, unless you have a great deal of criss-crossing objects in a clip.
— Tracker: A good second choice when Optical Flow can’t be used due to motion estimation errors like criss-crossing objects.
— Planar: Mostly used in simpler clips, where the majority of the image consists of planar surfaces such as the facades of buildings.
Masking Out Objects
When tracking a clip, the Camera Tracker automatically generates trackers on feature details. However, not all features that stand out in a clip are appropriate for camera tracking. You only want to track features that are “nailed to the set.” In other words, objects that move independently of the camera motion, like moving cars and people, cause inaccuracies when camera tracking. You must eliminate these types of objects from the analysis.
![]()
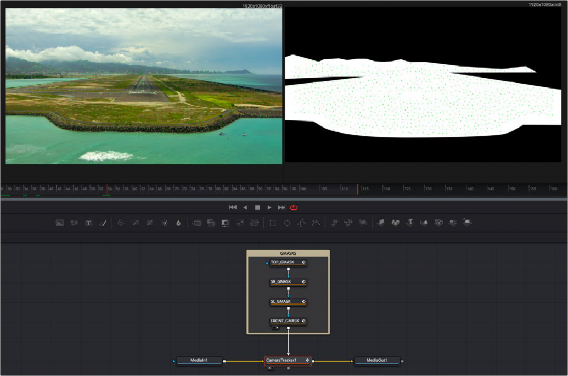
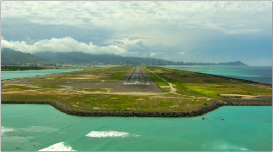
The primary way of avoiding these problem areas is by masking. You connect a mask to the Camera Tracker node’s Track Mask input to identify areas of a scene that the Camera Tracker can analyze. For example, if you have a clip of an airport runway along a shoreline, the waves of the water and moving clouds in the sky must be masked since they move independently of the camera.
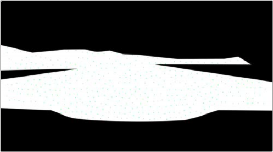
When creating a mask, the fixed areas of the image to be analyzed for tracking should be encompassed in the white portion of the mask. All moving objects that need to be ignored should be encompassed in the black portion. The mask should then be attached to the Camera Tracker Track Mask input.
Masks used to omit the moving clouds and waves from being tracked by the Camera Tracker
![]()
By doing this, the tracker ignores the waves of the water and moving clouds. Unlike drawing a mask for an effect, the mask in this case does not have to be perfect. You are just trying to identify the rough area to occlude from the tracking analysis.

TIP: If there’s a lot of motion in a shot, you can use the Tracker or Planar Tracker nodes to make your occlusion mask follow the area you want to track. Just remember that, after
using the PlanarTracker or PlanarTransform node to transform your mask, you need to use a Bitmap node to turn it back into a mask that can be connected to the Camera Tracker node’s Track Mask input.
The original image to be tracked (left), and the occlusion mask of the clouds and water (right)