< Previous | Contents | Next >
The Camera Tracker has no idea of the size of the 3D scene, so the scale parameter is used to scale the scene output. This makes it possible to match the scale of two or more clips.
Realign the Scene
Before exporting the scene from the Camera Tracker, you must set the 3D scene Transform menu back to Aligned. Now you’re ready to export.
Viewing the Exported Results
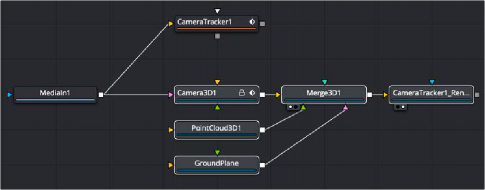
Clicking the Export button at the top of the Inspector creates a functional 3D scene with five new nodes automatically added to the node tree.
— Camera 3D
— Point Cloud
— Ground Plane
— Merge 3D
— Camera Tracker Renderer (3D Renderer)
![]()
Five nodes created as a result of exporting from the Camera Tracker
To work with the 3D scene, you can select the Merge 3D and load it into one of the viewers, and then select the Camera Tracker Renderer and load that into a second viewer.
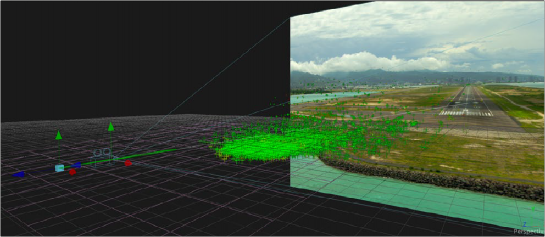
Viewing the Merge 3D shows the point cloud, ground plane, and camera
![]()
When the Merge 3D is selected, a toolbar above the viewer can add 3D test geometry like an image plane or cube to verify the precision of the 3D scene and camera. You can then connect actual 3D elements into the Merge 3D as you would any manually created 3D scene. The point cloud can help align and guide the placement of objects, and the CameraTracker Renderer is a Renderer 3D node with all the same controls.
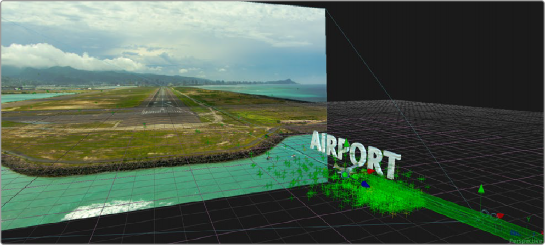
Use the point cloud to accurately place different elements into a 3D scene
At this point, there is no need for the Camera Tracker node unless you find that you need to rerun the solver. Otherwise, you can save some memory by deleting the Camera Tracker node.