< Previous | Contents | Next >
A sub category of the Color tools in Fusion that gives you access to various color processing tools.
Auto Gain [AG]
The Auto Gain node
Auto Gain Node Introduction
The Auto Gain node automatically adjusts the tonal range of an image, setting the darkest and brightest pixels to user-selected values. By default, the darkest pixels get pushed to black, the brightest pixels get pushed to white, and pixels in between get stretched to cover the tonal range evenly.
This can be useful when compensating for variations in lighting, dealing with low-contrast images, or visualizing the full color range of float images (although the viewer’s View Normalized Image option is generally more suitable for this).
Inputs
![]()
The two inputs on the Auto Gain node are the input and effect mask.
— Input: The orange input connects the primary 2D image for the auto gain.
— Effect Mask: The blue input is for a mask shape created by polylines, basic primitive shapes, paint strokes, or bitmaps from other tools. Connecting a mask to this input limits the auto gain
adjustment to only those pixels within the mask. An effect mask is applied to the tool after the tool is processed.
Basic Node Setup
The Auto Gain node, like many 2D image-processing nodes, receives a 2D image like a Loader node or the MediaIn1 shown below. The output continues the node tree by connecting to another 2D image- processing node or a Merge node.

An Auto Gain node applied to a MediaIn1 node
Inspector
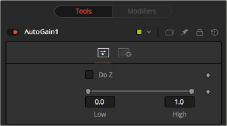
Auto Gain controls
Controls Tab

NOTE: Variations over time in the input image can cause corresponding variations in the levels of the result. For example, if a bright object moves out of an otherwise dark shot, the remaining scene gets suddenly brighter, as the remaining darker values get stretched to white. This also applies to sudden depth changes when Do Z is applied; existing objects may be pushed forward or backward when a near or far object enters or leaves the scene.
NOTE: Variations over time in the input image can cause corresponding variations in the levels of the result. For example, if a bright object moves out of an otherwise dark shot, the remaining scene gets suddenly brighter, as the remaining darker values get stretched to white. This also applies to sudden depth changes when Do Z is applied; existing objects may be pushed forward or backward when a near or far object enters or leaves the scene.
NOTE: Variations over time in the input image can cause corresponding variations in the levels of the result. For example, if a bright object moves out of an otherwise dark shot, the remaining scene gets suddenly brighter, as the remaining darker values get stretched to white. This also applies to sudden depth changes when Do Z is applied; existing objects may be pushed forward or backward when a near or far object enters or leaves the scene.
The Controls tab contains the few primary controls necessary for customizing the AutoGain operation.
Select the Do Z checkbox to apply the Auto Gain effect to the Z or Depth channels. This can be useful for matching the ranges of one Z-channel to another, or to view a float Z-channel in the RGB values.

EXAMPLE Create a horizontal gradient with the Background node. Set one color to dark gray (RGB Values 0.2). Set the other color to light gray (RGB Values 0.8).
Add an Auto Gain node and set the Low value to 0.0 and the High value to 0.5. This causes the brightest pixels to be pushed down to 0.5, and the darkest pixels get pushed to black. The remainder of the pixel values scale between those limits.
![]()
This Range control sets the black point and white point in the image. All tonal values in the image rescale to fit within this range.
Common Controls
The Settings tab in the Inspector is also duplicated in other Color nodes. These common controls are described in detail at the end of this chapter in “The Common Controls” section.