< Previous | Contents | Next >
These checkboxes allow you to choose which frames and vectors create the in-between frames. Each method ticked on will be blended into the result.
— Prev Forward: Takes the previous frame and uses the Forward vector to interpolate the new frame.
— Next Forward: Takes the next frame in the sequence and uses the Forward vector to interpolate the new frame.
— Prev Backward: Takes the previous frame and uses the Back Forward vector to interpolate the new frame.
— Next Backward: Takes the next frame in the sequence and uses the Back vector to interpolate the new frame.
These settings tweak the optical flow analysis. See the Classic and Advanced Controls section for the Optical Flow node earlier in this chapter.
Common Controls
The Settings tab in the Inspector is also duplicated in other Optical Flow nodes. These common controls are described in detail at the end of this chapter in “The Common Controls” section.
Smooth Motion [SM]
![]()
The Smooth Motion node
Smooth Motion Node Introduction
The Smooth Motion node smooths various AOV (Arbitrary Output Variables) channels in a clip using optical flow to look at neighboring frames. It can be used for smoothing the Disparity channel in a stereo 3D clip, where it helps reduce temporal edge/fringing artifacts, but it can also smooth a wide range of channels like vectors, normals, and Z.
It is required that the image connected to the input on the node have precomputed Vector and Back Vector channels; otherwise, this tool prints error messages in the Console window.
Check on the channels you want to temporally smooth. Be aware that if a channel selected for smoothing is not present, Smooth Motion will not fail, nor will it print any error messages.
It can also be used to smooth the Vector and Back Vector channels; however, sometimes, this can make the interpolated results worse if there are conflicting motions or objects in the shot that move around erratically, jitter, or bounce rapidly.

TIP: You can use two or more Smooth Motion nodes in sequence to get additional smoothing. With one Smooth Motion node, the previous, current, and next frames are examined for a total of 3; with two Smooth Motion nodes, 5 frames are examined; and with three Smooth Motion nodes, 7 frames are examined.
TIP: You can use two or more Smooth Motion nodes in sequence to get additional smoothing. With one Smooth Motion node, the previous, current, and next frames are examined for a total of 3; with two Smooth Motion nodes, 5 frames are examined; and with three Smooth Motion nodes, 7 frames are examined.
TIP: You can use two or more Smooth Motion nodes in sequence to get additional smoothing. With one Smooth Motion node, the previous, current, and next frames are examined for a total of 3; with two Smooth Motion nodes, 5 frames are examined; and with three Smooth Motion nodes, 7 frames are examined.
Another technique using two Smooth Motion nodes is to use the first Smooth Motion node to smooth the Vector and Back Vector channels. Use the second Smooth Motion to smooth the channels you want to smooth (e.g., Disparity). This way, you use the smoothed vector channels to smooth Disparity.
You can also try using the smoothed motion channels to smooth the motion channels.
Inputs
The Smooth Motion node includes a single orange image input.
— Input: The orange image input accepts a 2D image. This is the sequence of images for which you want to compute smooth motion. This image must have precomputed Vector and Back Vector channels either generated from an Optical Flow node or saved in EXR format with vector channels.
Basic Node Setup
The Smooth Motion node takes the output of the Optical Flow node for the required Vector and Back Vector channels. The Smooth Motion node can then be used to smooth those channels or AO channels.

![]()
A Smooth Motion node using Vector and Back Vector channels from the Optical Flow node.
Inspector
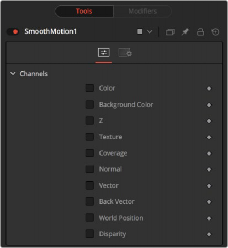
The Smooth Motion Controls tab