< Previous | Contents | Next >
![]()
The Paint Controls tab
Controls Tab
Not all of the controls described here appear in all modes. Some controls are useful only in a specific Paint mode and do not appear when they are not applicable. The Controls tab is used to configure your paint settings before painting. Once a paint stroke is created, except for the Multistroke and Clone Multistroke, you can select the stroke in the viewer and update the controls.
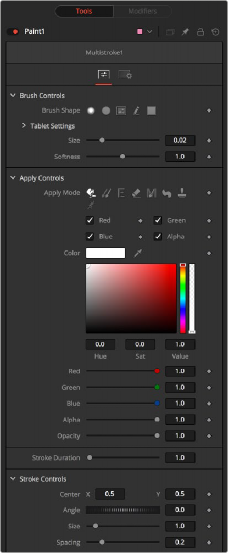
Brush Controls
The brush shape buttons select the brush tip shape. Except for the single pixel shape, you can modify the size of the brush shape in the viewer by holding down the Command or Ctrl key while dragging the mouse.
— Soft Brush: The Soft Brush type is a circular brush tip with soft edges.
— Circular Brush: A Circular Brush is a brush tip shape with hard edges.
— Image Brush: The Image Brush allows images from any node in the node tree, or from a file system, to be used as a brush tip.
— Single Pixel Brush: The Single Pixel Brush is perfect for fine detail work, creating a brush tip precisely one pixel in size. No anti-aliasing is applied to the single pixel brush.
— Square Brush: A Square Brush is a brush tip with hard edges.
Vary size settings change the stroke size based on speed or a pressure-sensitive pen and tablet.
— Constant: The brush tip remains a constant size over the stroke.
— With Pressure: The stroke size varies with the actual applied pressure.
— With Velocity: The stroke size varies with the speed of painting. The faster the stroke, the thinner it is.
Vary opacity settings change the stroke opacity based on speed or a pressure-sensitive pen and tablet.
— Constant: The brush tip remains at a constant transparency setting over the entire stroke.
— With Pressure: The stroke transparency varies with the applied pressure.
— With Velocity: The stroke transparency varies with the speed of painting. The faster the stroke, the more transparent it is.
Use this control to increase or decrease the Softness of a soft brush.
![]()
When using the Image Source brush type, select between three possible source brush images.
— Node: The image source is derived from the output of a node in the node tree. Drag the node into the Inspector’s Source node input field to set the source.
— Clip: The image source is derived from an image or sequence on disk. Any file supported by Fusion’s Loader or MediaIn node can be used.
— Brush: Select an image to use as a brush from the menu. Images located in the Fusion > Brushes directory are used to populate the menu.
When the Fill tool is selected, a Color Space menu selects the color space when sampling colors around the Fill tool center for inclusion in the fill range.
When the Fill tool is selected, a Channel menu selects which color channel is used in the fill paint. For example, with alpha selected, the fill occurs on contiguous pixels of the alpha channel.
Apply Controls
The Apply Modes are buttons that change a brush’s painting functionality.
— Color: The Color Apply Mode paints simple colored strokes. When used in conjunction with an image brush, it can also be used to tint the image.
— Clone: The Clone Apply Mode copies an area from the same image using adjustable positions and time offsets. This mode can also copy portions of one image into another image. Any image from the node tree can be used as the source image.
— Emboss: The Emboss Apply Mode embosses the portions of the image covered by the brush stroke.
— Erase: Erase reveals the underlying image through all other strokes, effectively erasing portions of the strokes beneath it without actually destroying the strokes.
— Merge: This Apply Mode effectively merges the brush onto the image. This mode behaves in much the same way as the Color Apply Mode but has no color controls. It is best suited for use with the image brush type.
— Smear: Smear the image using the direction and strength of the brushstroke as a guide.
— Stamp: Stamps the brush onto the image, completely ignoring any alpha channel or transparency information. This mode is best suited for applying decals to the target image.
— Wire: This Wire Removal Mode is used to remove wires, rigging, and other small elements in the frame by sampling adjacent pixels and draw them in toward the stroke.
The stroke controls contain parameters that adjust the entire stroke of paint as well as control it over time.
![]()
— Size: This control adjusts the size of the brush when the brush type is set to either Soft Brush or Circle. The diameter of the brush is drawn in the viewer as a small circle surrounding the mouse pointer. The size can also be adjusted interactively in the viewer by holding the Command or Ctrl key while dragging the mouse pointer.
— Spacing: The Spacing slider determines the distance between dabs (samples used to draw a continuous stroke along the underlying vector shape). Increasing this value increases the density of the stroke, whereas decreasing this value causes the stroke to assume the appearance of a dotted line.
— Stroke Animation: The Stroke Animation menu provides several pre-built animation effects that can be applied to a paint stroke. This menu appears only for vector strokes like Stroke and Polyline Stroke.
— All Frames: This default displays the stroke for all frames of the image connected to the orange background input of the Paint node.
— Limited Duration: This exists on the number of frames specified by the Duration slider.
— Write On: When Write On is selected, an animation spline is added to the paint stroke that precisely duplicates the timing of the paint stroke’s creation. The stroke is written on the image exactly as it was drawn. To adjust the timing of the Write On effect, switch to the Spline Editor and use the Time Stretcher node to adjust the overall length of the animation spline. To smooth or manually adjust the motion, try reducing the points in the animation spline.