< Previous | Contents | Next >
The Z To Disparity node

NOTE: The Z To Disparity node is available only in Fusion Studio and DaVinci Resolve Studio.
NOTE: The Z To Disparity node is available only in Fusion Studio and DaVinci Resolve Studio.
NOTE: The Z To Disparity node is available only in Fusion Studio and DaVinci Resolve Studio.
Z To Disparity Node Introduction
Z To Disparity takes a stereo camera and an image containing a Z channel and outputs the same image but with disparity channels in it. This is useful for constructing a Disparity map from CG renders, which will be more accurate than the Disparity map created from the Disparity node.
Inputs
The three inputs on the Z To Disparity node are used to connect the left and right images and a camera node.
— Left Input: The orange input is used to connect either the left eye image or the stack image.
— Right Input: The green input is used to connect the right eye image. This input is available only when the Stack Mode menu is set to Separate.
![]()
— Stereo Camera: The magenta input is used to connect a stereo perspective camera, which may be either a Camera 3D with eye separation, or a tracked L/R Camera 3D.
Outputs
Unlike most nodes in Fusion, Z To Disparity has two outputs for the left and right eye.
— Left Output: This outputs the left eye image containing a new disparity channel, or a Stacked Mode image with a new disparity channel.
— Right Output: This outputs the right eye image with a new disparity channel. This output is visible only if Stack Mode is set to Separate.
Basic Node Setup
Below, a stereo camera and an image containing a Z channel is connected to a Z To Disparity node. The same image is output with disparity channels.
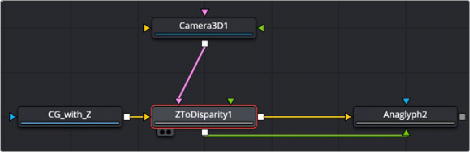
A Z To Disparity node takes an image with a Z channel and creates a disparity channel
Inspector
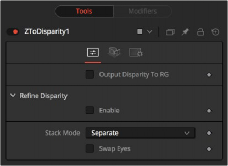
The Z To Disparity Controls tab
Controls Tab
The Controls tab includes settings that refine the conversion algorithm.
![]()
In addition to outputting disparity values into the disparity channel, activating this checkbox causes Z To Disparity to also output the disparity values into the color channels as {x, y, 0, 1}.
When activated, this option will automatically promote the RGBA color channels to float32. This option is useful for a quick look to see what the disparity channel looks like.
This refines the Disparity map based on the RGB channels.
Increasing this slider does two things. It smooths out the depth in constant color regions and moves edges in the Z channel to correlate with edges in the RGB channels. Increasing the refinement has the undesirable effect of causing texture in the color channel to show up in the Z channel. You will want to find a balance between the two.
This is the pixel-radius of the smoothing algorithm.
In Stack Mode, L and R outputs will output the same image.
If HiQ is off, the interpolations are done using nearest-neighbor sampling, leading to a more “noisy” result.
This allows you to easily swap the left and right eye outputs.
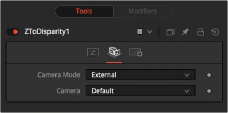
The Z To Disparity Camera tab
Camera Tab
The Camera tab includes settings for selecting a camera and setting its conversion point if necessary.
If you need correct real-world disparity values because you are trying to match some effect to an existing scene, you should use the External setting to get precise disparity values back. When External is selected, a magenta camera input is available on the node to connect an existing stereo Camera 3D node, and use the Camera settings to determine the Disparity settings.
If you just want any disparity and do not particularly care about the exact details of how it is offset and scaled, or if there is no camera available, then the Artistic setting might be helpful.
![]()
If you connect a Merge 3D node that contains multiple cameras to the camera input, the Camera menu allows you to select the camera to use.
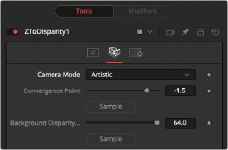
Artistic Camera mode
If you do not have a camera, you can adjust the artistic controls to produce a custom disparity channel whose values will not be physically correct but will be good enough for compositing hacks. There are two controls to adjust: