< Previous | Contents | Next >
The From Image modifier only works on gradients, like the gradient on a Background node. It takes samples of an image along a user-definable line and creates a gradient from those samples.
Unlike other modifiers, From Image is not located in the Modify With menu. This modifier can be applied by right-clicking a Gradient bar in the Inspector and selecting From Image.
Inspector
From Image modifier
Controls Tab
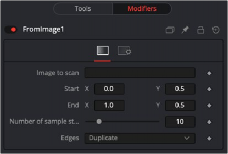
The From Image controls tab in the Inspector is used to select the node that contains the image you want to sample. It allows you to define the starting and ending point in the image as well as how many color samples to use in creating the gradient.
Drop into this box the node from the Node Editor that you want to be color sampled.
These two point controls define the Start and End points of the line along which the samples are taken from the image defined in the Image to Scan box.
The points can also be moved directly in the viewer.
This defines how many individual color samples are taken along the line. You can also see the result of this setting when you look at the actual node’s Gradient control. The more sample steps you define here, the more individual color stops appear on the Gradient control. It is also possible to first create a gradient using the From Image modifier and then remove that modifier from the Gradient control again. The created gradient stays intact and can then be fine tuned by hand.
Edges determines how the edges of the image are treated when the sample line extends over the actual frame of the image to be sampled.
This outputs black for every point on the sample line outside of the image bounds.
![]()
This wraps the edges of the line around the borders of the image.
This causes the edges of the image to be duplicated as best as possible, continuing the image beyond its original size.
EXAMPLE
EXAMPLE
EXAMPLE
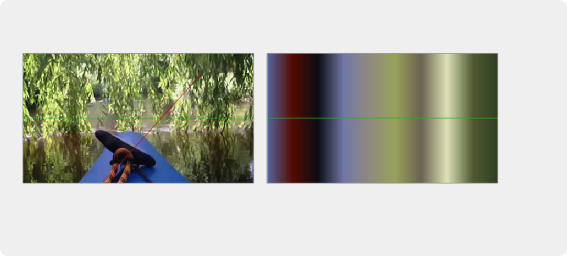
The source image on the left shows the color selection line in red. The image on the right
shows the resulting gradient from that selection.
The source image on the left shows the color selection line in red. The image on the right
shows the resulting gradient from that selection.
The source image on the left shows the color selection line in red. The image on the right
shows the resulting gradient from that selection.
This outputs a user-definable color instead of black for every point on the sample line outside of the image bounds.