< Previous | Contents | Next >
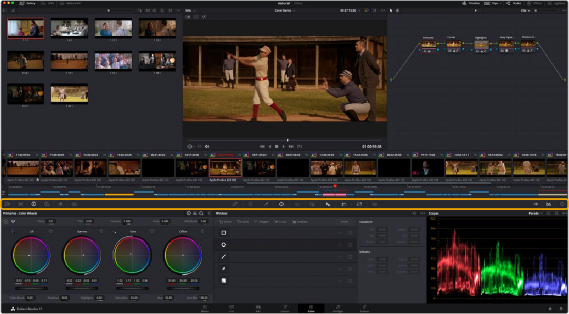
Within the Mini-Timeline the currently selected clip is highlighted in orange, and you can click any clip to select it. A scroll bar at the bottom lets you navigate to the left and right, while using the scroll wheel of your mouse zooms in and out. The Mini-Timeline shows at most six tracks of video. If your project has more tracks than that, you can scroll up and down to reveal the hidden tracks.
Any markers that were placed on clips or the Timeline in the Edit page appear here, and you can click any marker to reveal and edit its color and notes.
As seen above, a colored outline appears around the clip number of shots that have been graded, and this outline is doubled if there are additional versions applied to that clip.
For more detailed information about the Color page Timeline, see Chapter 126, “Color Page Timeline and Lightbox.”
Palette Area
Most everyday tools and functions for grading are distributed among a series of palettes found in the palette area of the Color page. These palettes can be accessed via a series of palette buttons running along the Palette bar at the top of this area.

![]()
![]()
All palettes seen in the Palette bar
These buttons also give you feedback about which palettes have adjustments for the current selected node in the Node Editor. Palettes with adjustments show a small orange dot in the corresponding palette button.


An orange dot in a palette button lets you know there are adjustments in that palette
Left Palettes
A series of palettes at the bottom left of the Color page provide access to different sets of grading tools, used principally for manipulating color, contrast, and raw media format settings. Each individual palette is opened by clicking the corresponding icon at the top of the Palette panel.
![]()
![]()

Left palette selection buttons
![]() Camera Raw palette: For making metadata adjustments to raw media formats
Camera Raw palette: For making metadata adjustments to raw media formats
![]() Color Match palette: Automatic grading based using test charts
Color Match palette: Automatic grading based using test charts
![]()
![]()
![]() RGB Mixer: For mixing color channels into one another
RGB Mixer: For mixing color channels into one another
![]() Motion Effects palette: With controls for noise reduction and artificial motion blur The five available palettes can be used individually or together depending on what you’re trying
Motion Effects palette: With controls for noise reduction and artificial motion blur The five available palettes can be used individually or together depending on what you’re trying
![]()
to accomplish. For more information on most of these palettes, see Chapter 129, “Primaries Palette.” For more information on the Motion Effects palette, see Chapter 151, “The Motion Effects and Blur Palettes.”
Center Palettes
At 1920x1080 resolution or higher, a second set of palettes is organized at the bottom center of the Color page. These palettes span a wide range of functionality, and the adjustments you make with them can be combined with those made using the Color palettes.
![]()
![]()
![]()
Center palette selection buttons

NOTE: At lower resolutions, the Left and Center palettes are merged to fit the DaVinci Resolve interface into a smaller area.
NOTE: At lower resolutions, the Left and Center palettes are merged to fit the DaVinci Resolve interface into a smaller area.
NOTE: At lower resolutions, the Left and Center palettes are merged to fit the DaVinci Resolve interface into a smaller area.
![]()
![]()
Keyframe Editor, Video Scopes, and Information
The bottom right of the Color page can be switched between one of three things:
![]()
![]()
![]()
The three controls for displaying the Keyframe Editor, video scopes, or Information palette
![]()
![]()
Furthermore, each node’s track can be opened up to reveal parameter groups, so that you can animate subsets of an individual node’s functions independently of other functions within the same node.
For more information about keyframing, see Chapter 145, “Keyframing in the Color Page.”
![]()
![]()