
< Previous | Contents | Next >
— To change how many scopes are displayed at once: Click one of the buttons in the upper right- hand corner of the Scopes window to set 1, 2, 4, or 9 up arrangements of the video scopes. You can also choose how many scopes are simultaneously displayed by choosing Workspace > Video Scopes > 1-Up, 2-Up, or 4-Up.
— To change which scopes appear in which pane: Click the Name drop-down at the upper left corner of each scope’s pane, and choose a different scope. If you like, you can instantiate more than one of each kind of video scope in multi-scope layouts, for instances where you want to view variations on a particular type of scope with different settings. For example, you might want to expose three Vectorscopes, setting each to a different tonal range so you can simultaneously view Vectorscope analyses of Low (shadows), Mid (midtones), and High (highlights).
Different layout options in the Scope window
Once open, you can resize the Scopes window to make it as large or small as you require, positioning on a second display if you want to make it even larger.
1 Click the Option button to the right of the Scope drop-down menu to expose the current scope’s Custom Controls window.
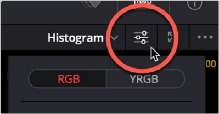
Clicking to open the current scope’s custom controls
2 Adjust any of the available controls to customize the look of that particular scope.
![]()
3 Click anywhere outside of the Custom Controls window to make it disappear.
Parade Scope Display Options
The Parade scope has the following options:
— RGB, YRGB, and YCbCr modes, allowing you to evaluate more channels than before.
— A colorize checkbox lets you view graphs in monochrome or false-color (indicating red, green, and blue).
— An Extents checkbox draws an outline highlighting all graph excursions, to unambiguously show you all overshoots and undershoots in each waveform.
— The Parade slider makes that scope’s graph brighter or dimmer. Brighter graphs make it easier to see fine detail, but harder to see which parts of the graph are stronger and weaker.