< Previous | Contents | Next >
Using the Log Mode Controls to Grade Log-Encoded Media
The Log controls are so named because they’re designed to work specifically with media with Log-C or similar gamma and color encoding, derived from the Cineon Log gamma curve, developed by Kodak to digitally store flat-contrast, wide-gamut image data that preserves image detail with a wide latitude for adjustment.
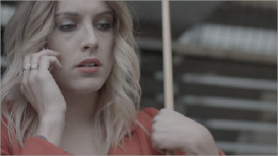
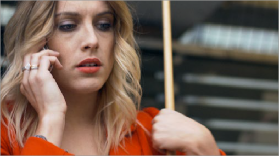
An example of a log-encoded clip (left), and the same clip after being normalized (right)
![]()
You can debayer most raw formats to a log-encoded image in order to derive the maximum amount of image data and adjustable latitude from that source. For more information, see Chapter 7, “Camera Raw Settings.” However, the resulting image needs to be normalized to occupy the final range of color and contrast that you intend for the final result. You can do this one of two ways:
— You can make a very careful curves adjustment in a second node to stretch the log-encoded image out to fit the contrast profile you want. By making this adjustment in Node 2, you make room for a customizing adjustment made using the Log controls in Node 1, prior to the normalization adjustment. This is key.
— You can also apply a 1D Output or 3D LUT to the first node of a clip to normalize the image. This is a faster, if less flexible operation, but a smooth tonal range may be easier to obtain. Since a LUT
applied within a node is always the last adjustment within that node’s order of operations, you can also use Node 1’s Log controls to customize the look of the footage.
TIP: Within corrector nodes, LUTs are applied after Log control adjustments, so if you want to keep the number of nodes in your node tree to a minimum, you can apply
a normalizing (or de-logging) LUT to the same node with which you’re making Log adjustments, knowing that the LUT will be properly applied after log adjustments. For more information, see Chapter 141, “Image Processing Order of Operations.”
In either case, it’s important that the normalizing adjustment happens after your Log control adjustments, for the Log control adjustments to work as they should. With your node tree set up in this way, you’ll be monitoring an ordinary-looking image, but taking advantage of the Log mode controls’ unique tonal ranges to manipulate the log-encoded image data with great specificity.
— First, use the Offset master wheel to set the black point, and use the Contrast and Pivot parameters to stretch or compress contrast as necessary to achieve the tonal range you require.
— Second, use the Offset color balance control to adjust the overall color balance of the image to your liking.
— Third, use the Shadow/Midtone/Highlight color balance and Master Wheel controls to make specific, targeted adjustments to the color and contrast of the image in tonal ranges that match where that data is in the log-encoded image.
Working in this way, you’ll find that adjustments made with the Offset color balance and Master Wheel controls and Contrast controls control the log-encoded image very nicely to create an overall adjustment, while the Shadow, Midtone, and Highlight controls allow you to fix specific issues, such as shadow balance and density, after your main adjustment has been set.
![]()
The following illustration shows an approximation of how the default ranges of the Shadow, Midtone, and Highlight controls divide the tonal range of a log-encoded image.
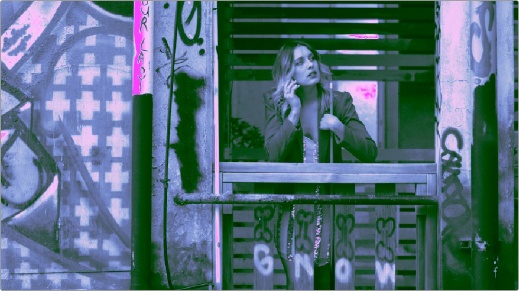
This graphic shows the tonal range of each of the Log controls when used with a log-encoded image