< Previous | Contents | Next >
— Show/Hide Zone button: This button lets you hide sets of zone controls you don’t want to adjust any further, leaving more room in the UI and on your control surface for the zones you do want to adjust. For example, if you decide you don’t need to use the default Black and Specular zones, you can hide them so that only the Dark, Shadow, Light, and Highlight zones are available to switch among. Zone controls with adjustments made to them continue to affect the image even if the controls are hidden.
— Delete Zone button: Deletes that zone. This is primarily useful when you’re creating your own zone preset. At the time of this writing, you cannot delete any of the default zones found in the default Zone preset.
Additionally, you have the option of adding zones, and saving zone presets to create your own custom ways of adjusting the image.
1 Open the Zones panel.
2 Click Create Zone, at the bottom of the Zones sidebar.
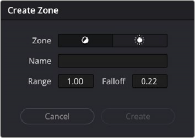
3 When the Create Zone dialog appears, choose the Zone type you want that zone to have (Dark/Min Zone or Light/Max Zone), enter a Name, and define the Range and Falloff values. Range,
Falloff, and Zone type are editable later, so don’t worry if you don’t set them up perfectly the first time.
The Create Zone dialog
4 Click Create. That zone appears added to the list, which is sorted in the order in which Range is defined, with Dark Zones appearing at the top, and Light Zones appearing at the bottom.
![]()
Zones Graph
The Zone graph is a key component of the HDR palette’s use. Along the bottom, a scale in stops shows the range over which the HDR palette operates. At the top, handles let you adjust the editable range boundaries that define the tonal range of each zone’s operation, superimposed over a histogram showing the current image as input into the current node. Running through the middle of the Zone graph, a curve shows you all the Global and Tonal color and contrast adjustments being made by the HDR palette in the current grade.
The relationship of the range boundaries with the source image histogram in this graph is extremely important. The range boundary for a particular zone must intersect with the part of the source histogram you want to adjust for the controls of that zone to have any effect. If any zone boundaries lie outside of the histogram, that zone’s controls will do nothing. In the screenshot above, the zone’s range boundaries all lie inside of the visible histogram, so each zone’s controls will make a predictable adjustment to the image data in that part of the histogram.
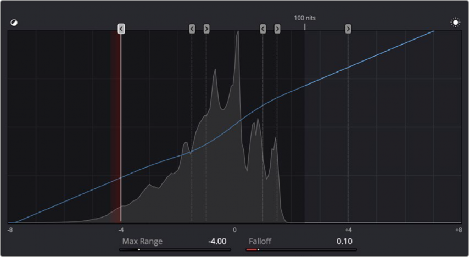
The Zone graph
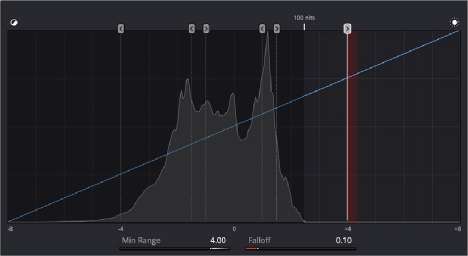
In the following screenshot, the Zone graph shows that the Specular zone boundary lies outside of the source histogram for the image, so adjustments made using the Specular controls will have no effect. For this reason, it’s a good idea to check that the zone boundaries intersect the parts of the image you want to adjust prior to manipulating the controls, but if you notice that a particular zone’s controls aren’t having as much of an effect on the image as you’d like, you can always move the zone boundary after the fact to expand the range of the image that’s affected by that zone.
![]()
The Specular zone boundary lies outside of the source histogram, excluding the Specular controls from affecting the image.
Customizing zone boundaries in this way is one of the most powerful aspects of the HDR palette, but don’t worry that you’ll be constantly dragging zone boundaries back and forth for every shot you grade. Generally speaking, most well-photographed scenes have similar ranges of image tonality in each shot, so zone boundaries that have been customized for one shot from that scene will likely be good for most clips in that scene. That said, adjusting zone boundaries is another powerful way of tailoring a grade specifically for a clip with a unique range of contrast.