< Previous | Contents | Next >
The Magic Mask palette is divided into three sets of controls: the Toolbar, the Stroke list, and the Mask Finesse panel. When you first open the Magic Mask palette, it’s empty, and you’re told to draw a stroke in the Viewer to create a mask.
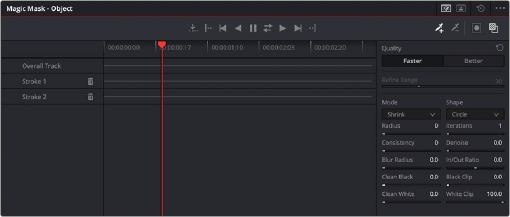
The controls of the Magic Mask palette in Object mode
Magic Mask Toolbar
A toolbar at the top contains most of the interactive controls of the Magic Mask palette.
![]()
— Object Mode: Selecting this icon puts the Magic Mask tool into Object mode for isolating subjects that are not people.
— Person Mode: Selecting this icon puts the Magic Mask tool into Person mode for isolating people and parts of people. A tab control at the left lets you choose the type of mask you want created. There are two choices:
— Person: For creating a mask to isolate as much of a person is visible, given the framing of the shot.
— Features: For creating a mask isolating just someone’s face, or hair, or arms, for example. In Features mode, you can also combine multiple specific features into a single mask.
— Tracking Controls: The following controls let you track all available strokes to follow camera or subject motion in the frame. From left to right, these include:
— Go To Reference Frame: Moves the playhead to the frame on which you initially drew the strokes.
— Go To First Frame of Tracked Area: Moves the playhead to the first tracked frame of a range of tracked frames, in preparation for tracking backwards if there are untracked frames at the beginning of the clip.