< Previous | Contents | Next >
Grouping is one of DaVinci Resolve’s most powerful features for organizing grades amongst multiple clips. Groups are manually created collections of clips with automatic linking relationships that make it easy for you to control the rippling of grades among sets of clips that you define. When clips have
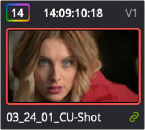
been grouped together, selecting one member of the group reveals a group “linked” badge at the top- right of each clip’s thumbnail belonging to the group.
The green link icon indicates this clip is in a group
You can create as many groups within a single project as you need. You can add or remove shots from the current group, and the current group is defined by the last shot you’ve selected (if it belongs to a group, that’s the new current group).
Once grouped, you can choose from one of four Node Editor modes to grade the current clip.
Which mode you choose determines whether that grade will automatically ripple to every other member of that group, or whether the grade will only affect that one clip. In this way, you can combine multiple node trees, some which will ripple, and one which won’t, to create the final look of each clip in that group.
For example, you might group together every clip from the same angle of coverage in a scene. You might also group together every clip from a particular section of B-roll that will be graded with the same treatment. This way, whenever you make a change or otherwise update one member of the group using one of the rippled Node Editor modes, every clip in the group will be changed together.
This section discusses how to create and manage groups, how best to use them, and what issues you need to be aware of to use groups to best advantage.
![]()
Creating and Managing Groups
The following procedures describe how to create, load, modify, and delete groups.
1 Select one or more clip thumbnails in the Timeline. You can select a contiguous range of clips by clicking one and then Shift-clicking another, or you can make a noncontiguous selection by Command-clicking individual clip thumbnails anywhere in the Timeline.
2 Right-click one of the selected clip thumbnails, and choose Add Into New Group.
3 Type a name into the field of the Group Name dialog, and click OK.
The new group is created, and the clips you had selected now appear with the “linked” group badge above the thumbnails.