< Previous | Contents | Next >
Adjusting Layer Node Strength Using Key Output Gain
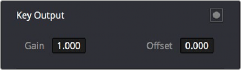
Whether you’re combining overlapping corrections, or mixing different adjustments using Composite modes, you’ll run into situations where you want to reduce the influence of one overlapping adjustment relative to the other nodes that are connected to the Layer Mixer node. This can be accomplished using each overlapping node’s Key Output Gain parameter, located in the Key palette.
Using the Output Gain parameter in the Key palette
Key Output Gain defaults to 1.00, but lowering this value reduces the strength of that node’s contribution to the Layer Mixer. Using the previous example, selecting Node 4 (the high-contrast image used to create the glow), opening the Key palette, and reducing the Key Output Gain parameter to 0.50 reduces the intensity of the Glow effect by half.

TIP: You can also use the Key Output Gain parameter to mix the proportion of adjustments being combined using the Parallel Mixer node.
TIP: You can also use the Key Output Gain parameter to mix the proportion of adjustments being combined using the Parallel Mixer node.
TIP: You can also use the Key Output Gain parameter to mix the proportion of adjustments being combined using the Parallel Mixer node.
You can use Key Output Gain to mix the proportion of any number of overlapping adjustments in order to create the perfect combination for your purposes.
Converting Layer Mixers to Parallel Mixers
You can easily convert a Layer Mixer to a Parallel Mixer should you discover that you need to mix your overlapping corrections evenly rather than combine them with priority. Keep in mind that you’ll lose the ability to use Composite modes.
![]()
— Right-click a Parallel Mixer node and choose Morph Into Parallel Node.