< Previous | Contents | Next >
Introduction to Manipulating and Combining Keys
Each node’s key input and key output makes it possible to route key channel data from one node to another so you can apply isolated corrections. Furthermore, the Key Mixer lets you combine a variety of keys from different nodes to create more detailed keys with which to tackle complex operations. This section covers all the ways you can recombine key data, as well as how keys can be used in conjunction with the Alpha output to create regions of transparency in a clip for compositing right within DaVinci Resolve.
Outside Nodes
Whenever you use a Power Window or HSL Qualifier to limit a correction within one node, a special node structure lets you automatically create a second node, called an Outside node, to apply additional adjustments to the inverse of the region you isolated in the previous node. Outside nodes are really just Corrector nodes with the Key Palette’s Key Input Invert control enabled, which makes it easy to apply separate corrections to an isolated subject and to its surroundings.
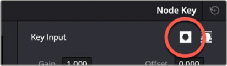
The Key Input Invert button, in the Key palette, that inverts any key fed to that node’s Key Input
In the following example, the sky has been isolated using a Power Window, and an Outside node has been added to make an additional correction to everything else within the shot.
![]()
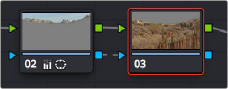
The Outside node automatically has its key input inverted.
1 Select a node that has been limited using a Power Window or HSL Qualifier.
2 Do one of the following:
— Choose Nodes > Add Outside (Option-O).
— Right-click a node choose Add Outside Node.
A new node is created immediately after the selected node, with the RGB and key outputs of the first node automatically connected to those of the new node.